A vase of Nigella

IMG_6912 Nigella - one of those blooms that makes you feel like a professional photographer...impossible to take a bad photo of it. I have an abundance this year, thanks to my sowing a few plants two years ago, and being scandalously lax with the weeding etc. ever since.

Their beauty is that they spread, without asking permission, but never making a nuisance of themselves. The perfect party guest.

IMG_6913

If you have none in your garden, then clear a bit of earth this autumn and get some seeds in. They need very little encouragement... a little thinning perhaps. They will flower, like these, next year, and you should cut lots, (for the bedroom I think...these are gloriously bedroomy blooms). Strip off the fennel-like leaves from each stem with a swipe of your fingers, and cut them short...(long is better as part of a big bodacious bunch, with other flowers). Leave a good half to go to seed (they are the most beauteous of seed heads, and then do nothing, letting the seeds fall and start the process again without your lifting a finger - that's my kind of gardening.

IMG_6920

My little jug was a wedding present, from and by Annabel Ridley engraved with important information about some of my favourite plants:

Lavender 'shall breathe forth the breath of Heaven'

Sage 'for domestic virtue'

Rosemary 'for remembrance and friendship'

Marjoram 'joy of the mountains'

Thyme 'like dawn in paradise' (Kipling)

Hyacinth 'for the feeding of the soul'

Fennel 'for strength, courage and longevity'

IMG_6922

Agapanthus 101

 How to grow Agapanthus

IMG_3709

My first day off yesterday, in just short of a year, and I got to spend it ogling at pretty flowers with the marvellous Debora who lunches with me irregularly, and shares my passion for extremely bad television.

We were at the RHS Spring Show - that vast hall, with the concentrated scent of new fresh growth, punctuated by narcissi, hyacinth, mimosa...depending on where you are standing.

IMG_6699

I am a sucker for spring...I cannot tell you how many bluer-than-blue corydalis, whiter-than-white anemones; how many tiny pots of scented pelargoniums I have bought at these shows - they totally see me coming. This year I was utterly sidetracked though, by Agapanthus. Hoyland Plant Centre, who hold the National Collection of Agapanthus, had a stand, complete with a lovely, geeky table explaining the different stages of growth, and (crucially) small plants in 9cm pots, and divided sections of larger plants, which I can actually afford.

IMG_6682

We went upstairs and sat down to listen to Steve give a talk on Agapanthus, and, as usual, I learned more from this twenty minute question and answer session than I'd gleaned from years of reading books or internet. One person with a passion, who knows his subject inside out and is able to explain it in plain English - the whole audience was rapt.

Here, in a nutshell, is what I learned.

There are two different types of Agapanthus. Deciduous and Evergreen. Deciduous are hardy pretty much everywhere. Evergreen need to be in the south (or see below for methods of protection).

Compost.

Needs to be well-drained. Steve uses two parts ordinary multi-purpose mixed with one part sharp sand or grit. Treat them mean. Too many nutrients will produce leaves and no flowers. (see below for fertiliser)

 Root restriction.

The rumours are true; these plants like their roots restricted at first. This helps the rhizome to form and bulk up, allowing for flowering. Obviously they therefore do well in pots. Here is the kind of pot-bound-ness that is perfect for an agapanthus. Don't re-pot until this level is achieved.

IMG_6703

Here's a plant that is too pot-bound and needs re-potting:

IMG_6704

If you want to plant in the ground and the roots are not yet congested enough, sink them inside a pot with the bottom removed.

 Feeding.

Feed regularly with a high potash feed (that's the 'K', or Potassium in your 'NPK' fertiliser; their feed is 30% potash) from March to September. This will encourage flowering.

 Winter care.

Give containers a really good soaking in November, buy a bag of bark chippings and mound them over the crown of the plant (in amongst the leaves if it's evergreen) and, if you can move them, bring them inside somewhere frost-free (evergreen will need light, deciduous won't) for the winter. If you can't move them, wrap the container with bubble wrap and then the whole thing with fleece. If you're in a sheltered area you'll get away without doing this, but if your plant is super-precious to you, then Steve says you should do it anyway.

In the border, just use bark chippings and mound them up over the buds.

 Dividing

Use a knife that's an appropriate size for whatever you're chopping. Steve likes his meat-cleaver. He also uses one of those Nigella-type mezzaluna things for smaller plants. He looks rather better than Nigella wielding the thing. It is a sight to behold. Sorry I didn't get a picture.

IMG_6705

Hack away...these plants are tough, but if you are using something serrated, then be sure to shave the cut with a knife afterwards so that the wound can heal cleanly (it's the difference between having a clean cut and a graze on your skin - clean cuts heal better and quicker. Leave the pieces to heal over for 24 hours before re-planting in the compost above. If you're re-planting in the ground then you don't need to do the plastic pot trick if the plant has flowered the previous year and has flower-buds on it - the rhizome is sufficiently bulky.

Here is the inimitable Steve with some of his cleavers. IMG_6709

I have a container-grown agapanthus that I've neglected for years and hasn't flowered for the last two or three. It's so pot-bound that it's pushing itself out of the container. I was about it release it from its pot, chop it up and re-plant in the border, but Steve says I should re-pot it first in a larger pot, feed and mollycoddle it for another year, and then chop it up, once it's flowering again - invaluable advice, brilliantly delivered.

I bought a beautiful chunk of Agapanthus praecox from Hoyland - an evergreen that I'm going to put with all my other agapanthus  in a special new bed I'm creating....updates soon.


Summer relish

 Another rather late post, because your gooseberries will be gone by now, but I wanted to share the gooseberry love, and also the glory of my garden to which I have done precisely NOTHING, and which nevertheless was styling it out beauteously in June and July (see pics below)... As Maria sang, I must've done something good.


IMG_6414

When I was little we used to go for sunday lunch with my grandparents. I don't remember much about these lunches, but I do recall the fact that they often merged into teatime. My grandmother had proper china tea in very thin cups that needed a silver spoon placed inside them before the tea was poured, lest the china should crack under the heat. I don't remember milk being an option (though I'm sure it was there)...everyone, including children had weak lapsang with a slice of lemon and that was that. And then there was also something called 'sticky bread', a treacly, molasses-laden confection which came from the supermarket, and which we spread with butter. Memories.

IMG_6313

This only relates to gooseberries because I was an eater of lemons, pilfering the delicious sunshine coloured semi-circles and scoffing the juicy flesh without so much as a squint. Sour is one of my greatest pleasures, so no surprise then, that I'm a gooseberry lover. I take them and eat them neat, even early in the season. I love the hairy skin, and the fact that they burst in your mouth. I love that other people aren't interested in them - less competition...all the more for moi.

I got my bush from Mark Diacono at Otter Farm, who sells a lovely selection of good, bare-root plants. Mine is Invicta, and it gave me an absolute bumper crop this year...too much to demolish in passing (even for me). I don't give it any special treatment. You could grow it in a pot if you wanted, but mine is in a raised bed with a redcurrant, some roses and a bit of lavender. Picking is a prickly business that needs to be done slowly and with some care if you want to emerge unscathed. Take care...it's worth it.

IMG_6315

The advice from Twitter was to make relish, from a recipe by the utterly brilliant Pam Corbin in her River Cottage Handbook 'Preserves'. It couldn't be simpler and, well, there's none left.

Just heat 500g sugar with 100ml cider vinegar and 100ml water, along with some spices (Pam suggests mustard seeds, fennel, cumin, nigella and fenugreek seeds). Dissolve the sugar and set aside for a while to infuse. Then add the fruit (1kg), along with some raisins and cook gently for 20 mins until you can pop the gooseberries and the thing is thick and gloopy. Pour into sterilised jars and use within a year.

IMG_6437


Five of the best for February

I went into the garden today (bit early, I know - how unlike me...I mean it's not even MARCH yet is it)

...but there was a sliver of sunshine, and the grass was gleaming, and the whole thing just sort of said 'come hither'. So out I waddled, inappropriately dressed as usual, and stood next to the Lonicera, and breathed deeply. I planted this shrub three years ago, when I bought it in a small pot at the garden centre. I never dare to hope too much when it's something I truly madly deeply love, so the fact that it has shot up and out and everywhere and is now blooming its gorgeous heart out is the best feeling...like I just won something in a raffle.

IMG_5750

If you don't have one of these, they'll be on sale NOW, flowering so you can sample that sweetly floral pong. Buy one and put it in. QUICK. It will make your Februarys sing.

There are snowdrops too.

I find it ridiculously difficult to get a good photograph of a snowdrop, but here you go. These are a slowly increasing patch of I forget which one...S. Arnott perhaps?, which are prettily scented, and which I pick mercilessly (naughty me)...but then I'm not in the garden enough over the winter to praise them like I should.

IMG_5744

Buy them now. Put them in a pot if you don't have a garden (these come from a pot where I'd kept them, on my windowsill for five years). Use John Innes no 2 compost, with some added grit. Enjoy.

Hellebores are the very loveliest of things out now, with their speckledy petals and wonderful bruised colours..

It is for this reason alone that I forgive them for not having scent (cardinal sin) but you can't have everything...you mustn't be greedy. I grow them under my apple tree, but also in window boxes and hanging baskets, where they do well enough for me to murmur to myself 'I must've done something GOOD'.

IMG_5748

An essential plant in any garden (sorry to be bossy, but it is true), and, as I said, you don't need a garden to have one or two in your life. Multi-purpose half and half with John Innes no 2 and you're laughing.

Sarcococca. I won't go on about sarcococca

....I blether about it far too much. Suffice to say if I had to choose between House of Cards (which I am LOVING) and my sarcococca, then Netflix would have to do without me. Here's var dignya, for your delectation.

IMG_5755

...And yes, if you don't have a garden, then it will do perfectly gorgeously in a pot...nice and deep please. Thank you.


And an update on my indoor shenanigans:

I sowed basil and some peashoots, amongst other things, just under three weeks ago on my Crocus blog. Basil just appearing now (it takes its own sweet time, does basil), but I've been eating sweet pale green peashoots for a couple of weeks now, and they look (and taste) just DIVINE.

IMG_5762

...it's like you can FEEL the chlorophyll, coursing through your body, doing you GOOD. Time to sow another pot I think. I also have rich micro-pickings of lettuce, coriander and dill.

Even if it's only February, my plate says it's summer time.


Garden sluttery and lavender baggery


The garden has been neglected (and is none the worse for that)...I'm sluttily leaving it until the second half of September, when I shall whip things into shape in that 'back to school' way we all have.

What HAVE I been doing?

well, mothering really. A three year old takes rather a lot of creative energy. You have to stay one step ahead.

I rarely manage it, so it's mostly me, running on a treadmill, really fast, just to stay in the same place, if you see what I mean.


This is not a blog, just some pictures of the lavender bag we made together... (or rather, I sewed, and she said 'oh commmoooooooon mummy')


Sometimes I think this blog should be titled "An excuse to show you my small daughter's beautiful dimpled hands".

...but for information's sake, you dry your lavender for a couple of weeks, pull it off its stem, make a little bag from some old, thin Liberty lawn (and using backstitch, of course...this is not the sort of thing for which one would go hoiking out the sewing machine...cumbersome things). I do not even hem - pinking shears do nicely - and tie the thing with a proper ribbon or bit of grosgrain.


The result is surprisingly heady, and I shall probably make more, because one small bag really does make a whole drawer smell delicious.

I'm taking a break for a bit now. Normal business will be resumed when the blogging god tells me to get on with it.

Until then xx

Take-home Chelsea: Cleve

Remember Chelsea?

I've been meaning to do a few blogs about doing Chelsea at home but, like the British summer, I am slow at getting into gear this year...

A few stand-out things have stayed with me since Chelsea, and they won't go away. I think this is an excellent marker of VERY GOOD STUFF. Hurrah for slowness.

Cleve West's garden for Brewin Dolphin was my instant favourite. Not JUST because of the frothy, billowing planting (which, if you know me at all, was bound to appeal), but more importantly because all that froth had a foil...

...my eyes could dance over bliss, and then have a rest

The planting was staggeringly beautiful (this IS Cleve after all)

Ferns and alchemilla creeping, with irises, euphorbia, poppies ammi and matthiasella holding their hands, and then the whole thing crowned by cirsium and crambe (which wasn't even out, but was all the more beautiful for that...I do love the PROMISE of something don't you?)


To get this at home any time soon is tough without access to a Russian oligarch

...those amazing yew monoliths need years and years of growth and clipping...this is gardening for your grandchildren.

But you CAN do it small, and get the same effect.

This is one of those occasions where if you have little or no space, you win. You can fill a space with these, and get that same sense of majesty and softness because your garden is within each container. In the ground it would just look a bit embarrassing because the topiary would feel too small.


You need:

Container. Make them beautiful. This is one of those times where you should probably pay more than is strictly comfortable. Mine is from Crocus, for whom I regularly review products. Their own-brand terracotta pots are distinctly lovely, with a soft apricottyness about them. Get your pot first and then choose your plants accordingly.

A piece of topiary. Box or yew, but for Cleve-ness, choose dark, mysterious yew.

Some froth. Fine to go and find some frothy bedding like diascia or verbena at the garden centre, but for less faffing next year I'd go for little ferns, alchemilla mollis, or erigeron.

Method:

I use a half and half mix of multi-purpose and john innes 2, and I usually bung in a handful of fertiliser granules if I have them to hand. I plant slowly and carefully because I enjoy it. I water diligently and always put a big saucer under the pot so that the compost can soak moisture up from the bottom. With terracotta pots like these, I also water the outside of the pot when it's hot.

A courtyard full of these, or a long path lined with them? Fabulous.

Slow things...

I love slow things.

Here's something I made almost a year ago, when I was rushing around being very un-slow, filming stuff for telly.

Succulent off-sets, pinched off and squidged into the gritty-compost-filled frog of a brick. (You can get the recipe here).

It was done in haste (and many, many times over, because that's what you have to do with telly). I don't have a 'before' pic and I can't find the clip anywhere...but it is ridiculously easy to do. What I didn't get to mention then (because with telly you can't ever really say stuff that YOU think is relevant) is that a succulent will take its own, very sweet time to spread.

These little babies are the result of almost a year of benign neglect.

I like that.


George and his swamp

I've been meaning to do a quick update on the swamp I made for George back in January.  


Suffice to say, George is comfortable.

Here it was in January:


Also, late to the billion dollar party, I know, but I am finally having a love affair with Instagram (although I do want to add that that THE LENS OF LIFE DOES'T HAVE VASELINE, (or apricotty, 70's filters) so I shall probably fall out of love at some point.

Lavender dayzzz...

The lavender is a-buzzing.


This is one of life's good things.

I have lavender in pots, but my main lavender event comes in the form of twelve L. angustifolia 'Hidcote' plants that edge the ends of my flower beds.

... That fuzzy softness...it needs off-setting with a tidy lawn (or better still, stone or brick).

L. angustifolia is fully hardy, and covered in deep purple, two-lipped flowers (which you can see are not out yet). The is the perfect time to harvest some stems for drying, (although do leave some for the bees - lavender being ultra-rich in nectar). To dry, just gather a handful, and tie the ends of the stems with a rubber band. Hang it in a cool dry place, upside down for a couple of weeks, and then you can make lavender bags, or get creative in the kitchen.

Here's my lavender sugar (same concept as vanilla sugar) for which I plucked about a tablespoon of lavender buds and added them to a jar of caster sugar. I'll leave that to infuse for a couple of weeks and then make biscuits or ice-cream, or something.

If you want to grow lavender in a container (and look how delicious it is with terracotta), choose a large pot, because you want to allow your plant to grow into a great big wafty hummock, and make it a beautiful one too, because lavender is no flash-in-the-pan plant, and then just mix up some peat-free multi-purpose with John Innes no 2 and keep it watered (though not fed).

Of course, angustifolia is not the only lavender - there is L. x intermedia (often known as English lavender), which is rather smaller, and with rather more rounded leaves, and then there is L. stoechas (or French lavender) which has those funny bunny-eared bracts, - deeply chic, but do watch out, because it is only borderline hardy, and a hard wet winter will nuke it good and proper.


It's nice to sprinkle dried lavender on the floor, or on a table near a lighted candle for scented winter evenings, although with the extended winter we have just endured, I have been using Charlotte and Co's exquisite scented candle from their collection of lovely lavender things, which took me straight to summer whenever I used it. I also have their pillow spray, to which I have become rather addicted, because I am convinced it helps me get to sleep faster, and dream about good things.

I rather long to be a person who wafts around in a silken dressing gown....perhaps this is my little piece of that...silken..ness.

But back to reality...I can't post on lavender without sharing how I prune. This is pretty much the only plant in my garden (bar box) that I am fiercely strict with when it comes to chopping. The problem is that if you don't do it, then you lose that gorgeous mound-thing and you pretty much have to start again with a new plant.

So...when the flowers are over  and the bees have had their fill, I cut them all off, (down to the top of the leafy bit of the bush).

Then, at the end of September I chop the whole thing down brutally to about one-third it's original size:

...just like this. You will hate yourself, and it will feel terribly wrong, but it's not wrong, it's right. This way your plant will never get leggy or woody. It will always be like a soft, purple pouffe.

x

A rose and sweet pea arch

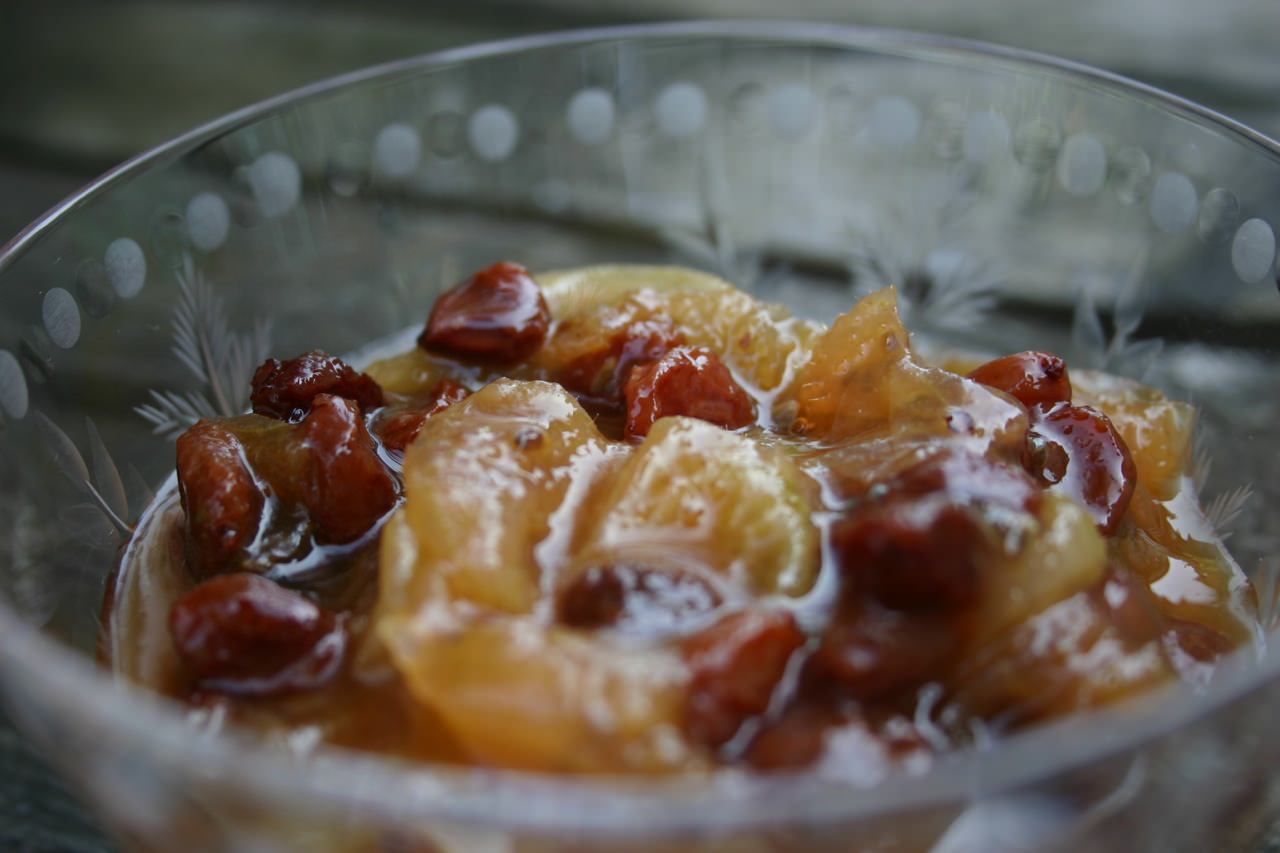
My new book, Sweet Peas for Summer is in the SHOPS, so I thought I'd do a little recipe in its honour

I've been wanting arches in my garden for quite some time now, (for sweet pea frolics and in order to satisfy my climbing rose fetish) and I've been holding back mainly because I thought it would be expensive, but then I spied these and realised it'd be silly not to really. True - it's not like having a proper blacksmithed confection, but, well, it's going to get covered in roses and sweet peas anyway.

So, for your gorgeous arch you need:

An arch like mine (or you could fashion one out of sticks and stuff if you were ... handy.

Two climbing roses. I have three arches, and I've used Rosa. Cecile Brunner on one, R. Blairii No. 2 on the second and R. Constance Spry on the third. The first two are eulogised in more detail here, and the third, well, I bought my roses from here with the kind help of Tom (talented flowersmith, who should definitely write a blog, and we all need to bully him until he does just that). Tom convinced me about Constance Spry by telling me that an arch full of it would be 'utterly camp'. Sold.

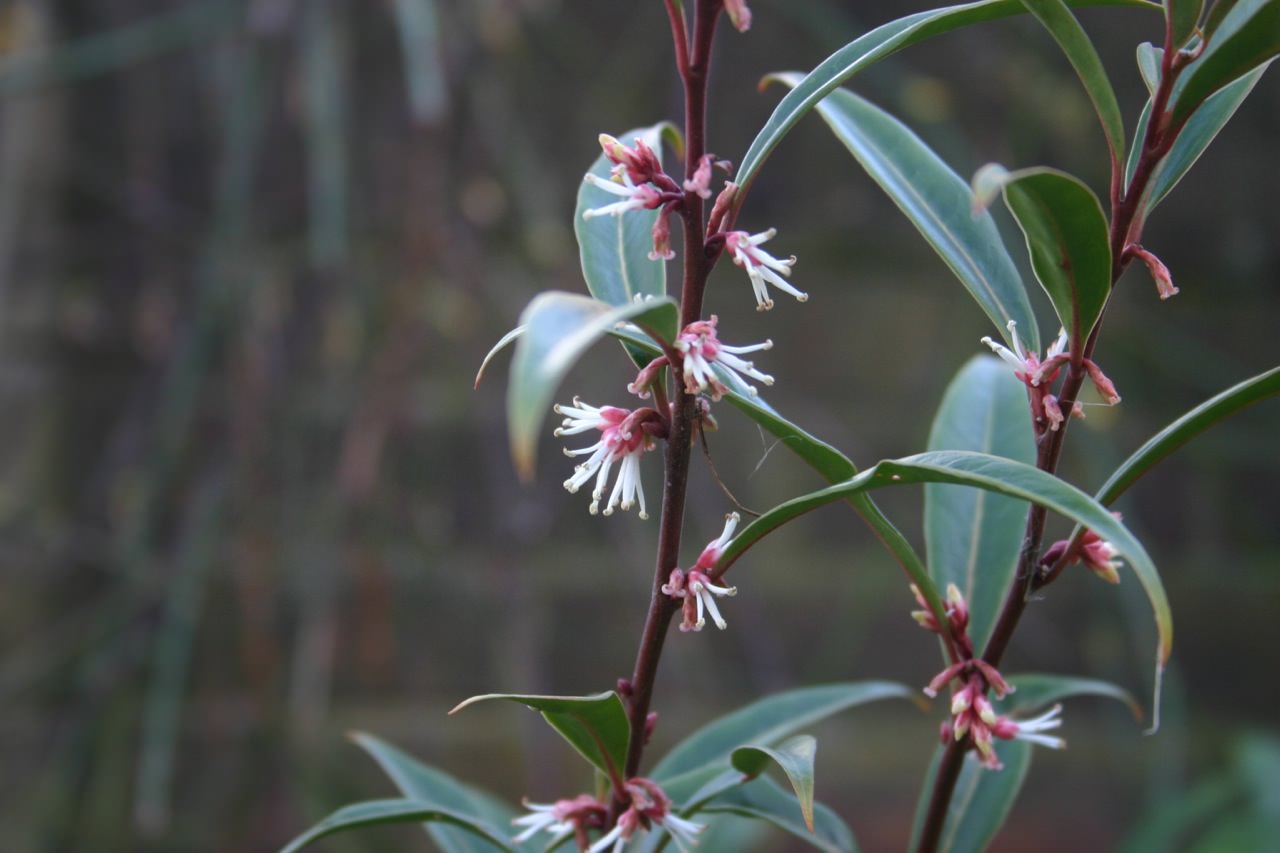
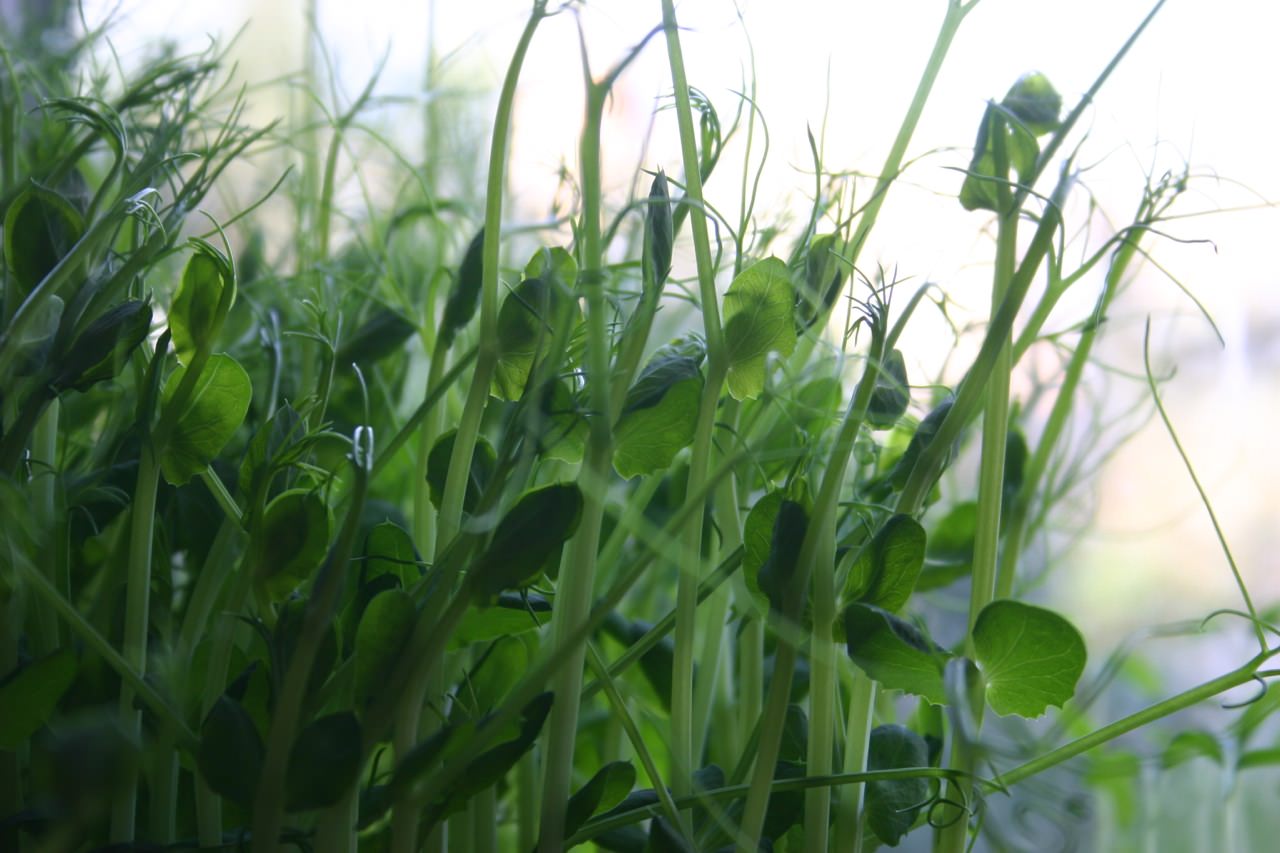
Sweet peas. It depends on the girth of the arch you're going for, but each of mine got about six sweet pea plants planted on either side. You can get sweet peas in the shops right now. Mine were sown in October last year (I know...get me!) and came from here. This is the first time I have ever done autumn-sown sweet peas. It is deeply satisfying but in my HUMBLE opinion it's not necessary unless you're planting hundreds of the things.

Some well-rotted manure (optional, but great if you can get it). Otherwise, chuck in some 'soil improver' also sold in bags.

A nice, weed-free, fertile, sunny site (i.e. the holy grail). I cleared each end of my raised vegetable beds to do this project. Don't worry too much if things aren't perfect though. Sweet peas are terribly obliging. They will give it a good go, whatever you do to them. Roses are a rather longer-term proposition, so do pick one that's suited to your site.

Some natural-coloured garden twine. (String, to you and me)

Some pea sticks or netting for those tendrils to climb up

Method:

First you need to erect your arch. Mine came flat-packed and I'm VERY glad I had a power drill to drive all those screws in (otherwise it would have taken me all day). It wasn't taxing though...just boring. Stick it into the ground and make sure it's properly secure. I know that I'm going to have to reinforce my arches some wintertime, because once there are roses all over them, then the wind will rock them (wind-rock is no good for roses, or anything else planty). This will probably involve driving a stake into the ground or something like that. At any rate, it's far too boring to think about right now. Once my arch was up, I stuck a twiggy pea stick into the ground to proved something for the sweet peas to climb up. You could equally throw some netting over the arch and tie it down securely.

Next, plant your roses. If they're in pots then they won't have put out roots yet so don't be surprised if all the compost falls away when you take them out. Dig two pretty deep holes at either side of the arch (you want your roses planted about 4cm deeper than they were in their pots). Put some well-rotted manure at the bottom of the hole and mix it with the earth that's already there, so everything is nice and soft and there aren't any big stones or obstacles to the roots getting down to find water. Put the rose carefully in its hole, looking at the stems and placing it so that they look like they're in the best position to start climbing, and back-fill carefully, firming the whole thing in really well with your foot. Water your roses diligently and continue to do so every day for at least two weeks, with a can of water for each one.

Now plant your sweet peas. I dug two trenches (little ditches) for mine, either side of the bottom of the arch (so that some peas will climb 'inside' the arch, and some will climb 'outside'. Put some well-rotted manure at the base of your trench and mix it in with the earth, then VERY carefully remove your sweet peas from their pots and plant them in the trench. If you have bought sweet peas, then there will most probably be several in each small pot. Do NOT separate them, but just plant them as they are, in a clump. Sweet peas hate their feet being fussed with so the less disturbance the better. I know that sweet peas are supposed to be spaced apart from each other but I promise this works, and if you try and separate the clump the plants will suffer (I've tried both ways!). If you really feel that things are too congested then you could just snip out a couple of the weakest looking seedlings at the base of the stalk.  If you have single sweet peas, then plant them 20cm apart. Firm it all in well, then gently gently gently tie as many shoots as you can in to the arch. This may not be possible at first, as your seedlings may be too small. You can see that I have stuck in some sticks (the sort you get attached to orchids with those funny plastic hair clips) to start them off in the right direction. You can do this too if you like (but do NOT spear those roots!).

It's fiddly, but worth doing all the tying in at first, so your peas know where to go and don't just trail along the ground, looking lost and sad.

Now water your sweet peas, and keep watering every day to get them off to a properly good start.

This is a ridiculously long post, so I'll post again to give maintenance tips for this project.

If you give it a go, do post a pic on my Facebook page - would be great to see it.
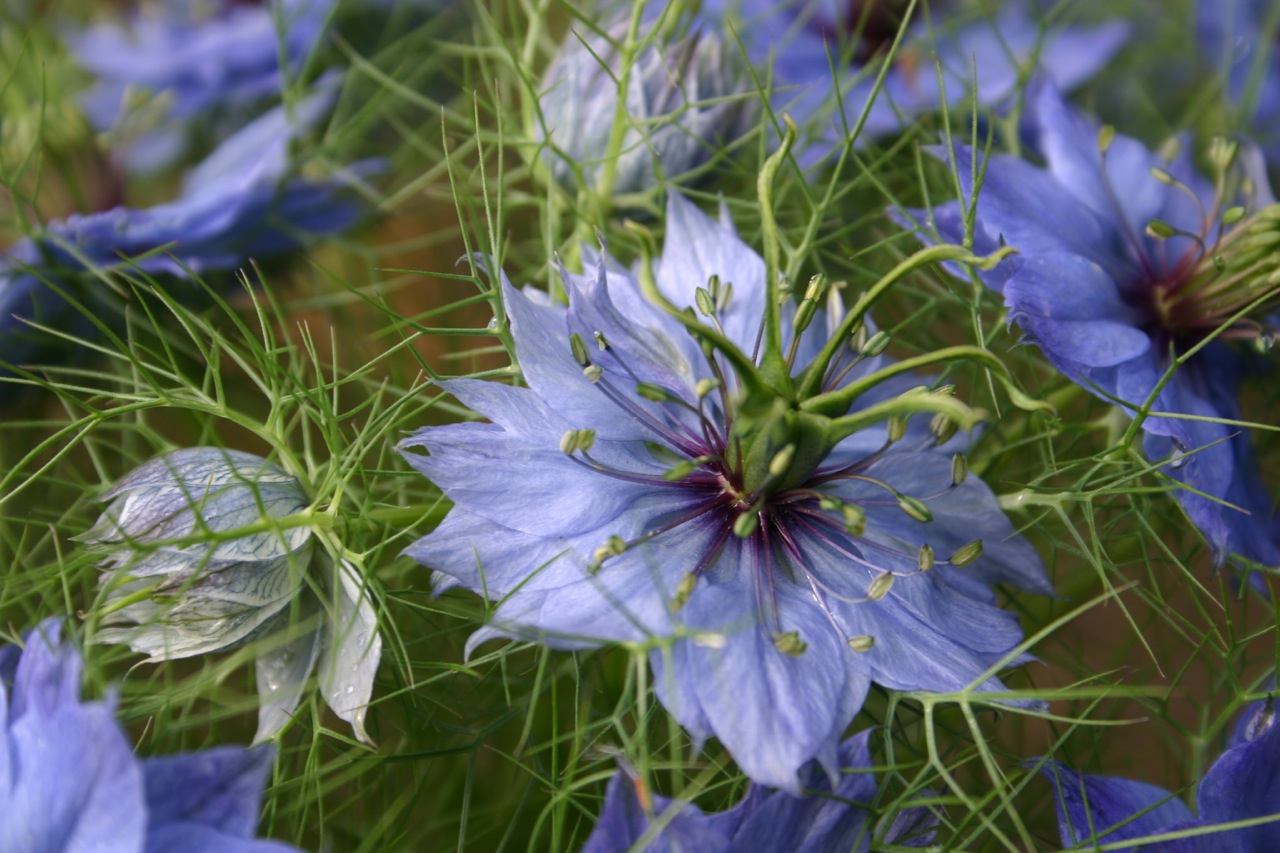
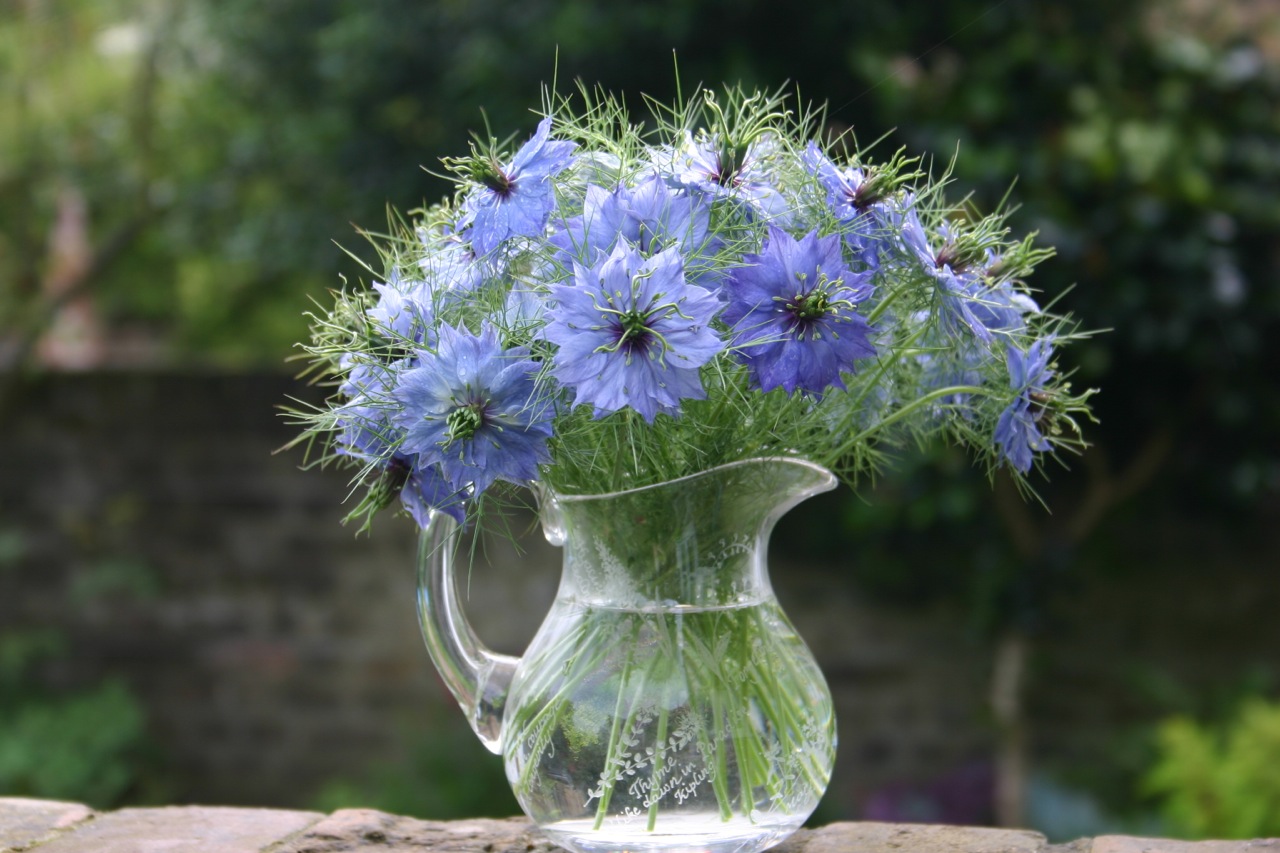
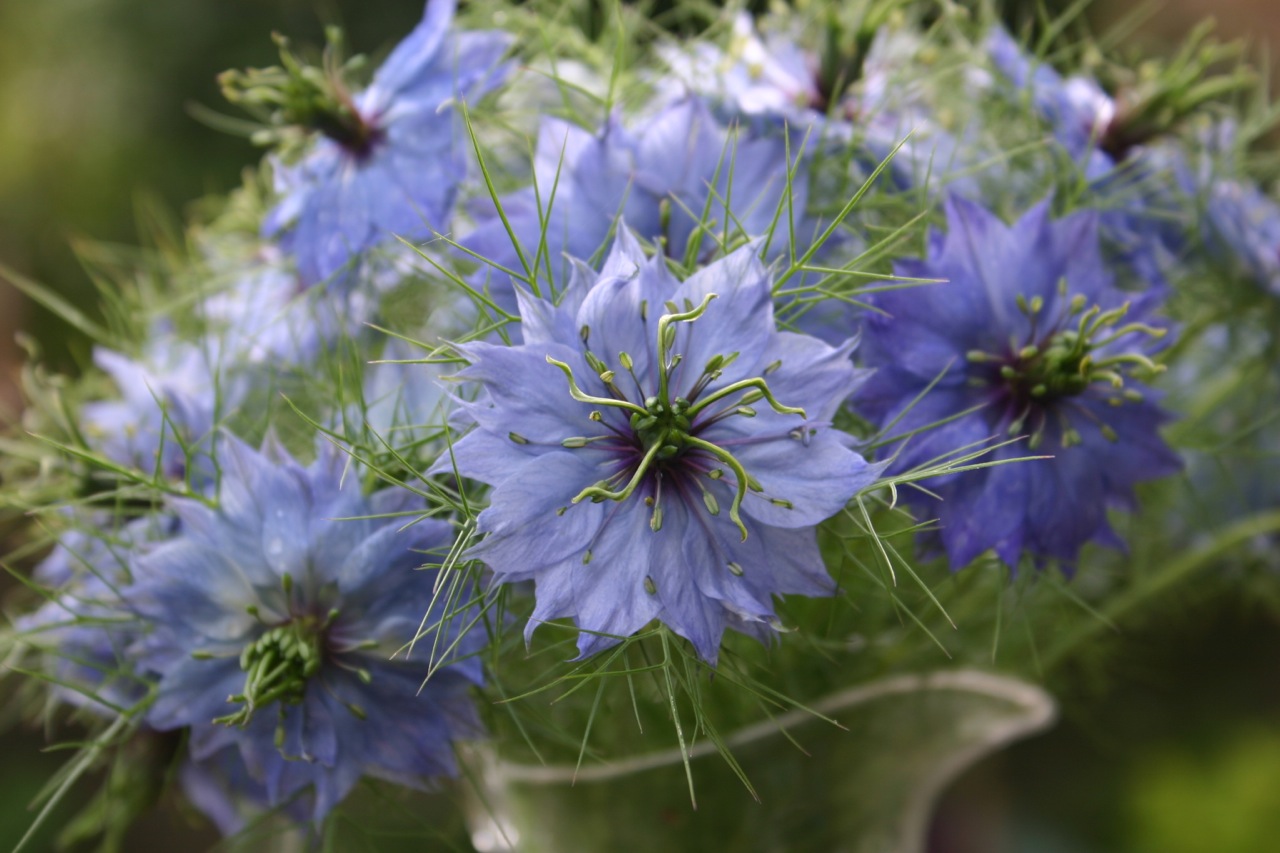
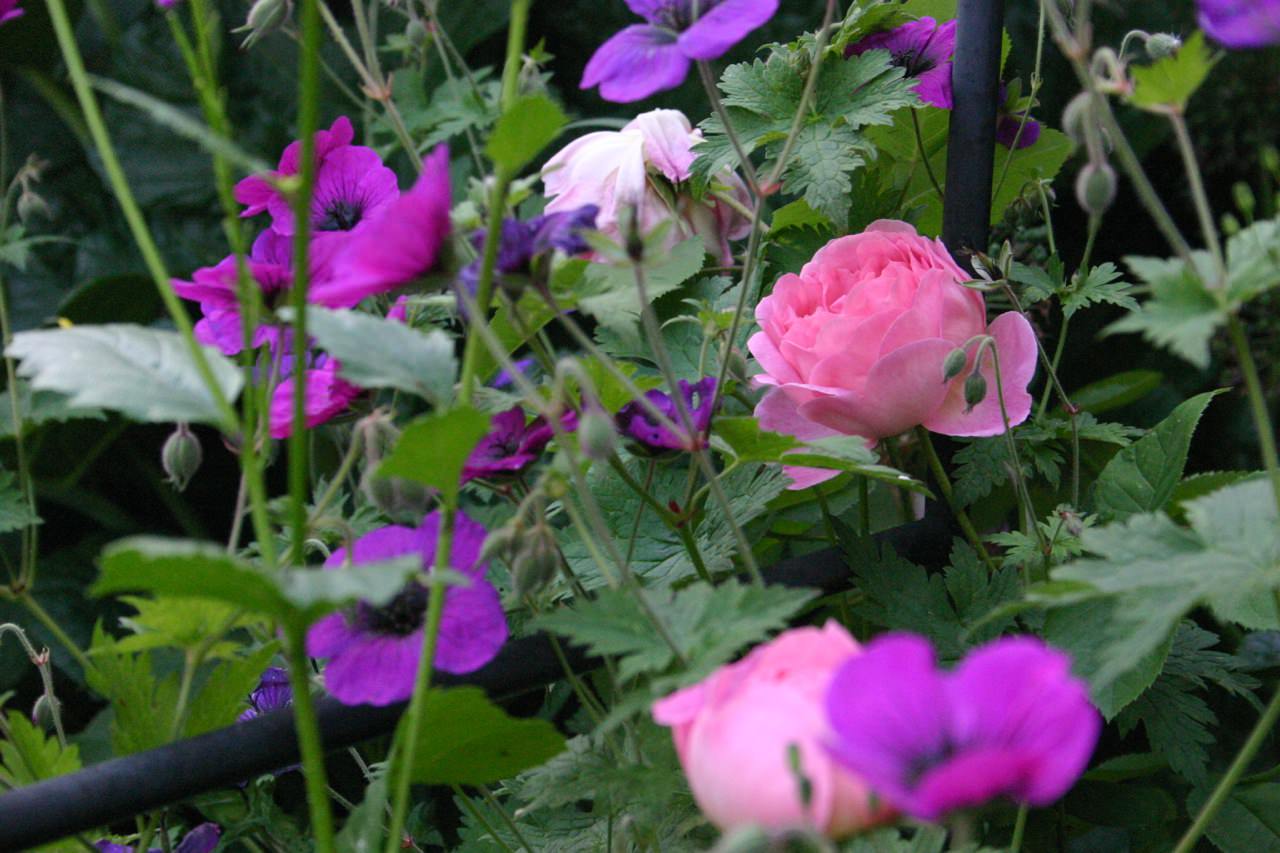
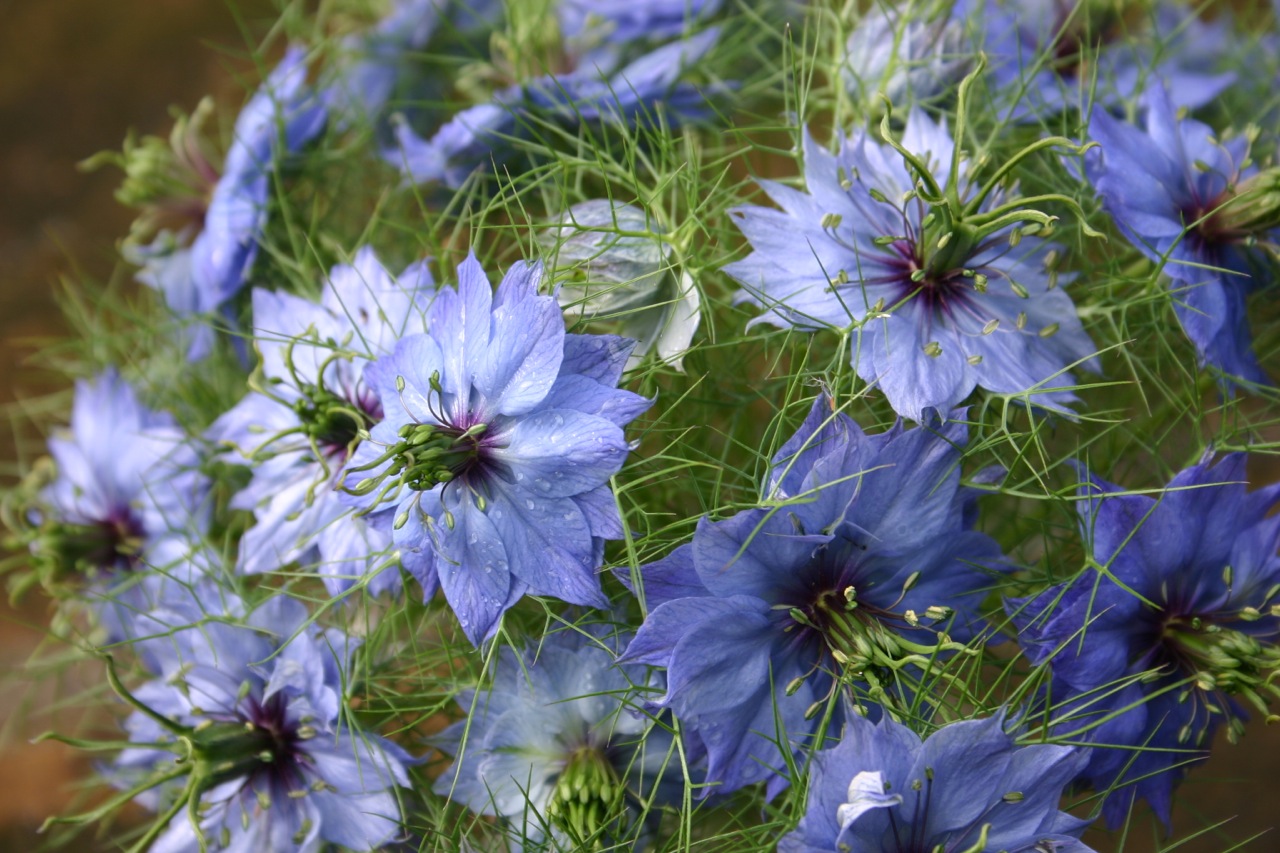
An Easter Nest

I love nests

I am the nesting type.

Around this time of year I can usually be found fashioning things to hold eggs...chocolate or otherwise.

I recently spied this lovely thing on the Marfa Stewart website.

I had pussy willow (because I always end up buying it at this time of year)...and my old, dried, crispy Christmas wreath, looking forlorn in a dark corner...crying out for me to dismantle it. The result is nothing like the perfection of Martha's...(I was time-poor, and the instructions are vague) but I love it all the same.

You need:

Some nest material: I used dried grasses from a selection of miscanthus and bunny tails that I'd just pruned from the garden, and the old, crispy foliage from some gladiolus callianthus that I had tied up aeons ago in my basement. Basically, a mixture of flat/thick and fine grasses....the sort of thing a bird might choose to make a comfy nest with.

Pussy willow: In all the shops right now - One bunch...mine came from the supermarket.

A wreath form - mine is about 35-40cm diameter

Some thin wire - mine is green

Wire cutters - I use sectaurs....*gasp*

Some fishing wire or thin, clear thread, and a thick, blunt needle (or 'bodkin' as my mother calls it)

Method:

First, take your wreath form and make a sort of dream-catcher out of it with your wire like this:


Next, separate your base-grass (in this case, my gladiolus leaves) into three or five handfuls and secure each of them with wire, and then attach them to the wreath form, just as you would if you were making a Christmas wreath (by placing them at regular intervals and securing them to the form with a long piece of wire like this:


So far, so messy, but don't worry (birds don't worry, do they).

Next, add in your thinner, prettier grasses. I just wove them in - I didn't need to wire them because I had the framework. Concentrate on the outside of your nest - don't worry about the base of it too much yet..you can fill that in later. Keep adding grasses until you have what looks like a bird's nest with a hole in the bottom.

Now you're ready to add your pussy willow. It's really amazing how pliable this stuff is. Start by pushing each individual stem into the base of your nest, weaving it in and out of the criss-crossy wires so that you have what looks like a child's drawing of the sun:


Then take the first stem and bend it firmly round the wreath form. Don't worry about breaking it - go tighter than you might think possible. Martha says you can just tuck them in and that's that...but my pussy willow had other ideas, so I threaded up a really long piece of fishing wire on a needle and 'sewed' the nest tight, holding each stem down as I sewed around it with my needle. There's no denying that this is fiddly, but once you've got the hang of it, it becomes pretty easy to do.


Fiddle around with the nest until you are happy with the look of it, and then line the bottom with some more grass (and I used a bit of sphagnum moss and a few feathers from a forgotten hat too). Make sure it's suitably messy (birds don't do perfect).


My egg is a duck-egg - blown and dyed with pink food colouring. This is very easy to do.

Even better, store your favourite chocolate eggs here. There is something about this nest that says 'hands off...I'm precious, and rare'.

If you don't feel like doing quite this amount of fiddling, then I've written a cheat's guide to nest-making which will appear very soon on the Crocus website...I'll keep you posted.


Something to soothe

  Never parTICularly been one for an 'erbal infusion' (unless it's lemon verbena or peppermint)

I'm far more likely to munch leaves or a flower in a salad...

or cover it with sugar and put it on a cake...


... but stuff's wee bit stressy at the moment, and I went out to pick a tiny posy because I thought it was something rare, and non-computer-based...and then I found myself marvelling at these pretty things, and I picked up Jekka's Herb Book, and it said  that a tisane acts as a 'mild sedative'...'good for anxiety and insomnia', so I chucked some leaves and a flower in a cup.

Primula vulgaris are mighty easy to grow, particularly if you have a deciduous tree kicking around, under which they can live in a nice, moist, partly shady world.

Wild primroses are less common than they should be, so don't pick them unless there are absolutely loads, and certainly don't pull them up by the roots.

Colours vary from the palest of creams to much deeper, eggy yellows, and look how pretty the buds are:


You can grow them in a pot - just use JI No2 and water regularly, and you can divide them in the autumn if you've got big clumps.

The scent is sweet.

I think the small bottle of blooms did more for my jitters than the tea

My new book is coming out soon - and people - (people I admire and respect) are being SO nice about it. This is totally wonderful and deeply gratifying and NOT what I expect...So thank you English Mum and Fennel and Fern.

This site came under attack a while ago and I basically lost the whole caboodle. It was the brilliant Neil who resurrected it, and who is now helping me to improve it. My beloved Lust List has completely disappeared and I am re-writing it (slowly but surely...a little bit every day....). I am hoping to have it back up soon as poss.


February bells

Muscari (Grape Hyacinth) are out in the shops right now. You should plant bulbs in autumn and LOTS of them...in which case you could do a lot worse than create a river like this one at Keukenhof (oh to see that one day).

But for those of us with a little less space, they are perfect for a container, a window-box, or any piece of glorious china you happen to have at home...just employ a bit of judicious 'plonkage' and cover any plastic pot bits with sphagnum moss. Indoors, they will go over quicker, but frankly who cares?

They are perennial bulbs, which means they'll come back year after year for you and have these tiny little urn-shaped flowers. They come in deepest cobalt, and also white and lilac (but honestly, why on earth would anyone want anything other than blue?).

A swamp for George

Soleirolia soleirolii - the perfect bathroom plant.

I've been using these lovely creeping emerald droplet-leaves for years now, both indoors and out.

Outside, they do this tight-knit, softening thing - the leaves are slightly tougher and darker, and none the worse for that. I long to take a machete to the cement between my paving stones and let it do its thing.

Some people regard it as a nuisance, but (as I've said many times before) nuisance plants are my kind of deal, for obvious reasons.

Indoors, it's a very different proposition. You can put this plant in almost any sort of container and it will thrive. The warmer it is, the longer the creeping stems will become, and the softer the cushioning.

I have this hideous window in my bathroom, and found a tray thingy in one of the big sheds. I thought I'd make a place for George the crocodile (Schleich toy of the moment) to hang out, and decorate this desolate window-sill (although I'm not sure you can even call it that).

You need:

1 x Soleirolia soleirolii plant - available at good garden centres in little pots. Sometimes it's sold under the name 'Helxine', sometimes 'Mother of thousands', sometimes 'Baby's tears' (ahhhhhh). I've never seen it sold in any of the big shed ones (silly billys, because it would fly off the shelves)

A container - anything you want, but you'll need drainage holes, which is why I had to drill some in my tray. I drilled three large holes with a fat drill bit that had a point on the end of it. It took a grand total of ten seconds...but if you hate stuff like that, then just use an ordinary pot or pots - terracotta is nice.

Some multi-purpose compost - try to find one without too many huge bits of bark in it. But if you can't, then just remove them when you come to fill your pot. This is simply to create the best environment for the creeping stems to attach themselves and put down roots.

A drill, to make holes (if you need them)

Method.

Fill your container with compost, right up to to the top. You don't want to be leaving a gap between the top of the compost and the rim of the pot because this plant's M.O is to 'spill' over the edge - it's very very pretty.

Now remove your plant from its plastic and divide it gently into little pieces. How many depends on the number of containers you have to fill, but know that it only takes the merest suggestion of leaf and roots, planted with care and attention (or not) to get this plant started and within weeks it will have covered the surface of the compost.

Of course, you could just buy enough to fill your entire container and have the finished product right there and then...no harm in that, except watching things grow is more fun.

Plant your pieces, making sure that the roots go in your compost, and the leaves remain above it, but generally you can be quite slap-dash and just squish it in.

Water well from above with a watering can that has a rose attached to give you a gentle shower of water, and from below also, by putting your container into another one, filled with water, and leaving it there to soak.

Keep the compost damp at all times (which isn't hard, in a bathroom, is it?)


Comforts

This lovely thing is soothing my heartstrings right now. I made it in October last year, having bought rather too many hellebores. I wish I had made more - it's one of those all-year-round pots to which you do precisely nothing, and it sits around looking gorgeous in spite of that.

Bruised, sober, ever so slightly funereal...but with bulbs in it, symbolising hope (?)...okay, I'll shut up now - suffice to say, we are one year on from this. Tricky.

Here's how you do it:

So here's the thing -

I love cyclamen and pansies as much as the next person

...and I have buckets of them everywhere...

...but right now I'm in the mood for something that'll go the distance with me...

Here's a lovely pot that will remain lovely all year round. I've been growing hellebores in pots and window-boxes ever since I began gardening and they are completely low-maintenance and trouble-free. I've added some bulbs to this pot for spring zing, but a hellebore and some pretty ivy is enough for me...enjoy.

You need:

1 gorgeous hellebore...they're on sale now and there are a squillion different permutations 3 little ivy plants 5 dwarf daffodil bulbs A pot (mine is 30 cm diameter) Some multi-purpose compost, mixed half and half with John Innes no. 2, because this pot is not a flash-in-the-pan part-time lover...it's a keeper.

Simply fill the pot with compost half full and put a circle of bulbs around the edge. Place your hellebore in the centre and fill in the gaps, squidging your ivy into the sides as you go. Don't worry about the bulbs getting through...they always manage somehow. Water it thoroughly and enjoy x

Honeysuckle, but not as you know it

Plant eulogy alert:

This is Lonicera x purpusii 'Winter beauty' (Winter honeysuckle).

It's flowering right now, and has been since the middle of November.

Last year it came out at the beginning of January #weirdweather

It is quite the most exquisite thing when it's flowering...these fairy pale cream flowers (usually covered with frost) and the scent, which is subtle but oh-so-special...a mixture of sweet floral with that element of what I call 'choke' -

...that tea-like dryness - which ALWAYS takes whatever it is out of 'lovely' and into 'Wow. Want it. Gotta have it'.

A properly special thing to bring indoors when you want something deliciously special in terms of scent.

Is it too punchy of me to say you NEED this plant?

You NEED this plant.

Mine has been planted out into the garden after a couple of happy years in a large pot on my old balcony....so you don't need a garden.

True...it doesn't do much for the rest of the year...not parTICularly gorgeous in form but I promise...all will be forgiven...

...with just one delicious WHIFF.

Post-party paperwhites

More bulbs, I know, but hey, this is seasonal stuff...and I'm not going to argue with that.

I usually put a load of paperwhites (little daffodils, highly scented and prepared to flower indoors over the winter) into containers in late October for Christmas blooming, but, as with the rest of what I've been doing this year, everything went a bit squiffy this autumn because I've been finishing my book...c'est la vie.

The last paperwhites are available right now in the shops. You can put them in ordinary compost or bulb fibre, but I like growing them in deep vases which reduces the need for twiggy support (indoor stuff tends to flop over eventually because we live in the warm).

You need:

Some paperwhite narcissi bulbs

Some glass vases

Some sort of 'mulch' (stones or marbles or gravel) I've used slate, which is...yeah, 'interesting' and not the prettiest thing on the planet, but I happened to have it to hand.

Method:

First, wash your mulch (my slate chippings were covered in dust, which would turn the water brown (no thanks)

Fill your vases with a layer of your chosen mulch (6-8cm is ample) and then fill with water so that the water comes just level with the top of the mulch.

Now place your bulbs a-top your stones or whatever. Soon, their clever roots will 'feel' that there is water below, and start growing downwards. The long stems will grow upwards, supported by the sides of your chosen container.....and then there will be those blooms....and that scent...Delish

Take back your mint...

...Take back your pearls....

It just turned chilly enough for me to wish I was on the beach wearing a bikini.

...and mint is THE thing to evoke the freshness of summer.

Here's how to have it over the winter.

You need:

1 mint plant (do you already have one? You probably think it's died...It hasn't...It's just having a bad hair day, because it's winter).

1 pot, with holes in the bottom

A bit of multi-purpose compost (peat-free please)

Some horticultural grit, or pea gravel.

Method:

Take your plant and knock it out of its pot, or yank it out of the ground (whatevs, just get a nice bit of root...long and squirly).

Cut the root into small bits, about 2cm long.

Now fill your pot with compost, just a couple of centimetres shy of the rim, and lay the root pieces, 2-3cm apart, on the surface.

Cover the root cuttings (for that is what they are) with grit or gravel, water the whole thing, and leave it inside your kitchen windowsill.

Magic will happen...and soon (the above photo and the one below were taken exactly 14 days apart) There is nothing quite so lovely as seeing those pale green hairy leaves peeping up at you - just keep the thing watered and you'll have mojitos for Christmas.


Violet's Spoon


I never knew anything called 'stir-up Sunday' existed until I saw it on Twitter.

Is it an American thing? Why have I missed it? Possibly because my mother (very sensibly) buys her Christmas Cake from a SHOP.

Anyhow, I'm a sucker for family stuff like this (well, I'm in the first bloom of motherhood aren't I)...so I did the cake thing, and we stirred....

and wished with eyes tightly closed...

And because it is a CEREMONIAL type of stirring, I dug out Violet's spoon.

Violet's spoon was given to me by my cousin Paula when I got married. It belonged to her grandmother (Violet) and is more a weapon than a spoon really.

It is vast and long-handled and great for doling out food when you've got friends round, because you can serve someone at the opposite end of the table without getting up from you chair....(very lazy).

I love it.

...so as I was stirring and wishing, I knew I had to celebrate the spoon a bit more...

You need:

A spoon like Violet's (or, obviously, any shallow bowl-like thing). See here for more suggestions

Some sempervivums or other succulents. I have babies a-plenty from this project, but you can find them in the better garden centres (the ones that haven't removed every single plant and replaced them with yawny christmas things).

Multi-purpose compost

Horticultural grit or gravel

Method:

Carefully select a few choice rosettes, nipping them from your plant with your fingernails - (the babies shooting outwards from the main mother rosette are perfect for this, but if your plant doesn't have any then just carefully pull a whole rosette off your plant, remove the bottom two layers of leaves so you get a 'stalk' and use that.)

Put a small amount of compost in the spoon or whatever you are using, dampen it slightly with water so that it's moist but not wet (turn the whole thing upside down and squeeze any excess water out through your fingers if you add too much).

Now just poke your rosette or rosettes into the compost, and finally fill in the gaps with gravel.

Display. (I will be displaying Violet's spoon indoors in a bright place over the winter, and then re-planting the semps outside in the spring).

Watering. I'll be watering Violet's spoon with a tiny smidgin of water every couple of weeks, but only because they're indoors. My outdoor ones get nothing at all...ever.


My thanks to English Mum for posting about stir-up Sunday...Her cake recipe is here and looks fabulous. I used my favourite cake book of the moment, Pam Corbin's River Cottage Cakes, because I happened to have it in my handbag when I was a the supermarket (yes, you read that right...it is hand-bag size). Her Christmas cake recipe is called 'The Mother Cake' - brilliant name.

Cyclamen wedding cake


All of us...(oh, not you then...?) okay, but MOST of us have one of these thingys lying around.... a wire cake stand, that is...

After the initial 'ooooh, that's purdy, I'll so USE that for all the, CUPCAKES I make!', mine ended up in a cupboard just TAKING UP SPACE.

So I thought I'd use it for some kind of confection of cyclamen, which, let's face it, are the only thing widely on sale right now everywhere.

You need:

A cake stand like mine, preferably one that's annoying you.

Cyclamen. For my cake stand, I used 6 little plants (all on sale, because they were in a sorry state, and I had to save them). You could also use little ferns, or little pots of ivy, or pansies.

Multi-purpose compost

Sphagnum moss, which comes in sheets - perfect for lining anything that is holey, and prettifying anything that is ugly.

Method

Line the wire stand with moss so there aren't any gaps. Now remove the cyclamen from their pots and squish them in, using extra multi-purpose if you see any gaps. Water it and disPLAY. I put a candle in the top bit, but chocolate fingers would be even better (or of course, another cyclamen).

You're going to need to put the whole thing on a big plate or tray to catch any bits. Keep the plants watered so that the compost remains moist but not sopping. I take the whole thing outside and let it drip out before I return it to the table. I tend to water cyclamen quite carefully because if you let big droplets linger on the leaves or stems then they often rot. To avoid this, I use a watering can with a thin nozzle and stick it under the leaves so that I only get water on the compost.

And last but not least, remember to dead-head. This will give you more flowers....

...and you'll like that.

x