Agapanthus 101

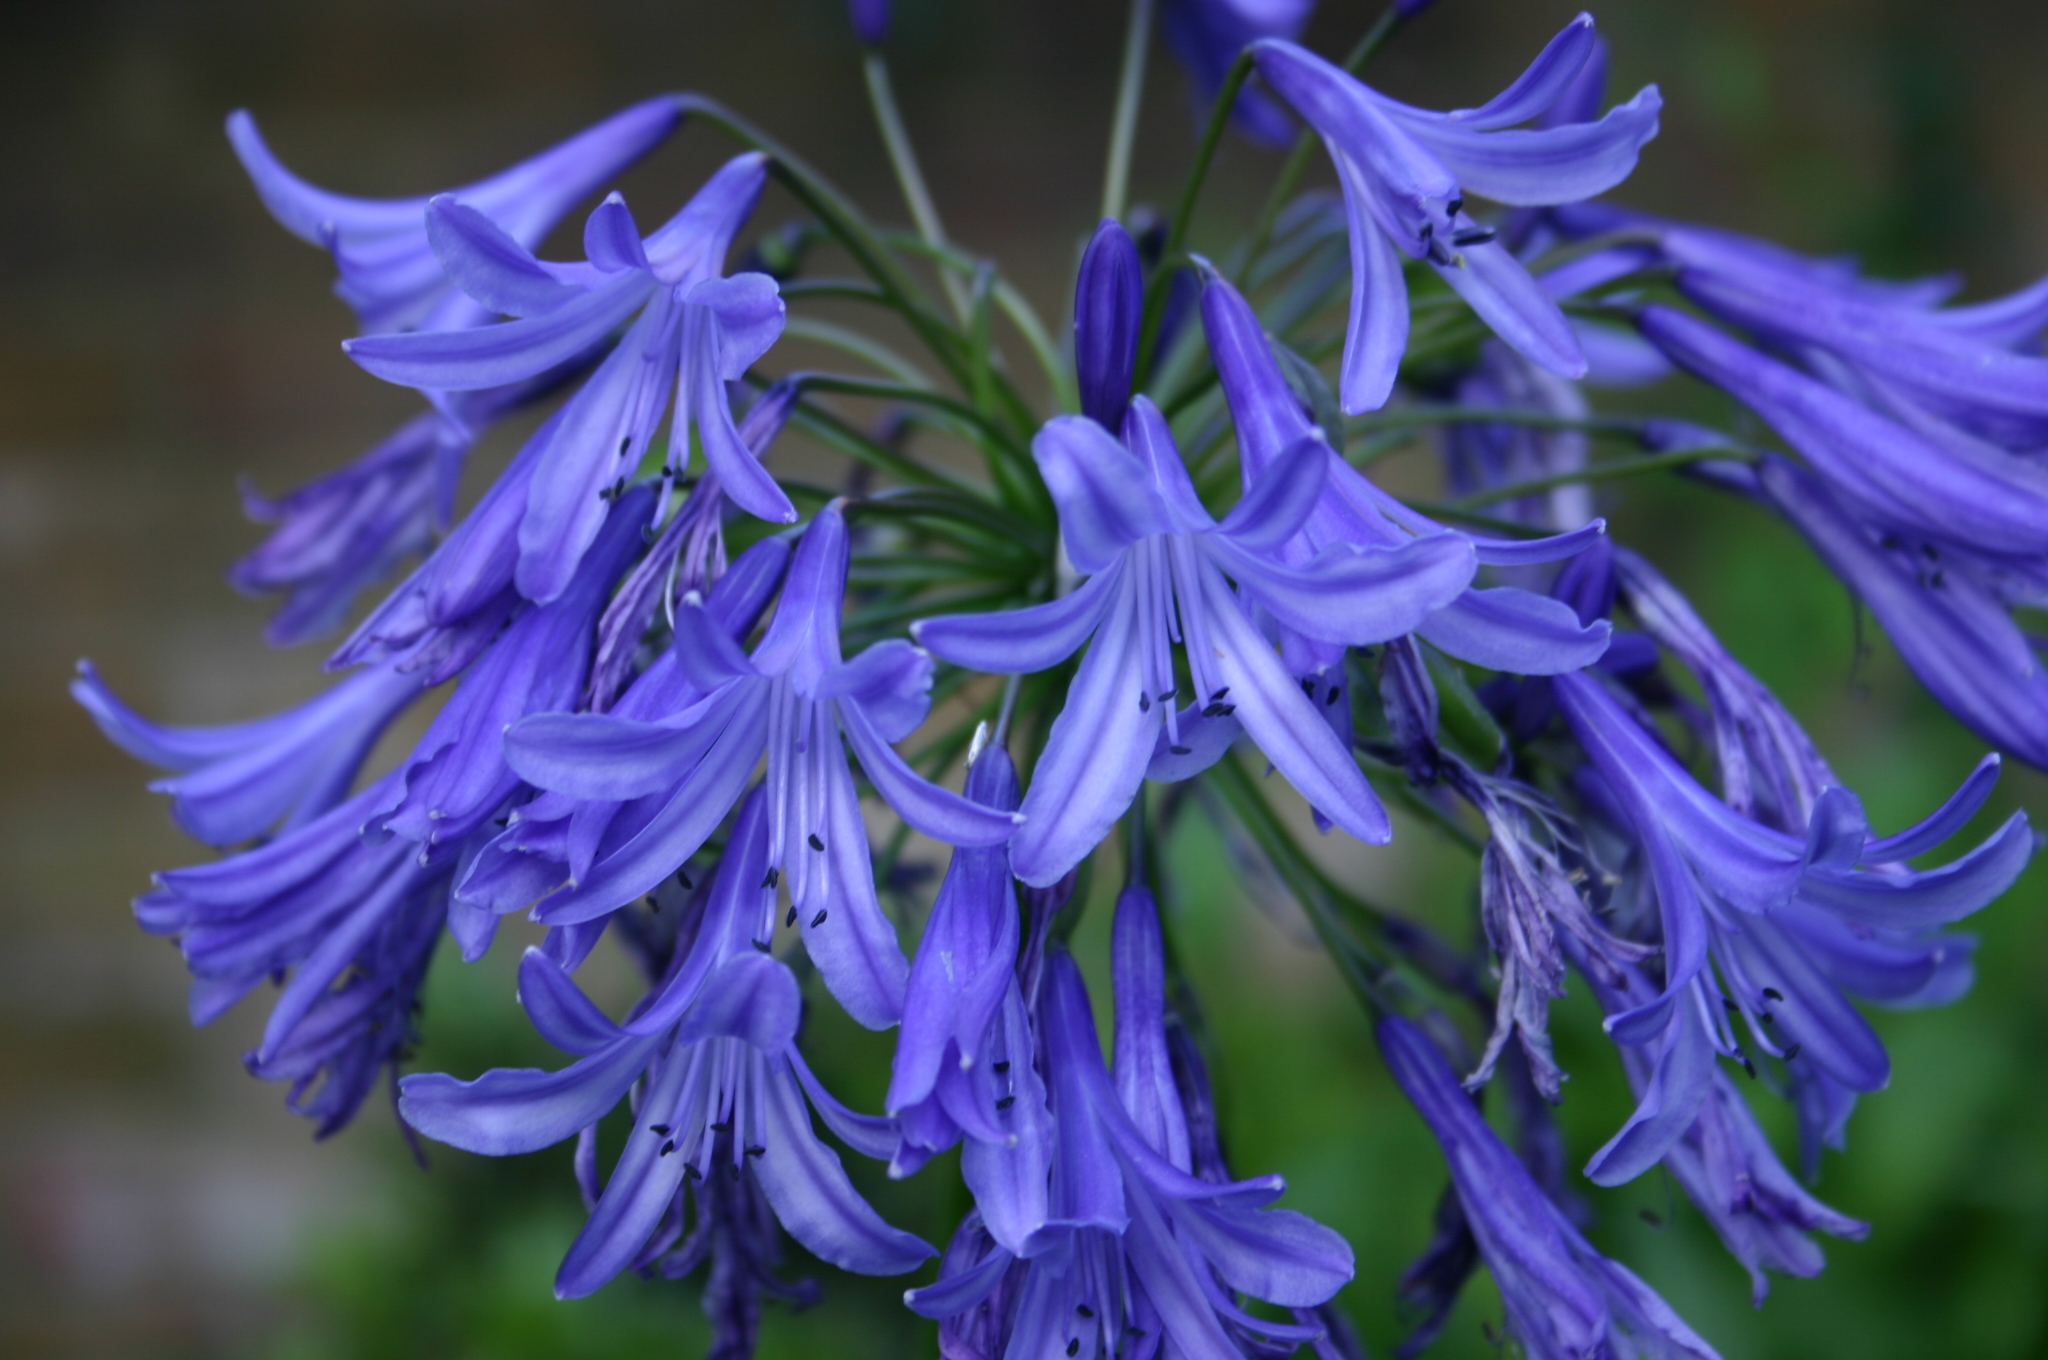
 How to grow Agapanthus

IMG_3709

My first day off yesterday, in just short of a year, and I got to spend it ogling at pretty flowers with the marvellous Debora who lunches with me irregularly, and shares my passion for extremely bad television.

We were at the RHS Spring Show - that vast hall, with the concentrated scent of new fresh growth, punctuated by narcissi, hyacinth, mimosa...depending on where you are standing.

IMG_6699

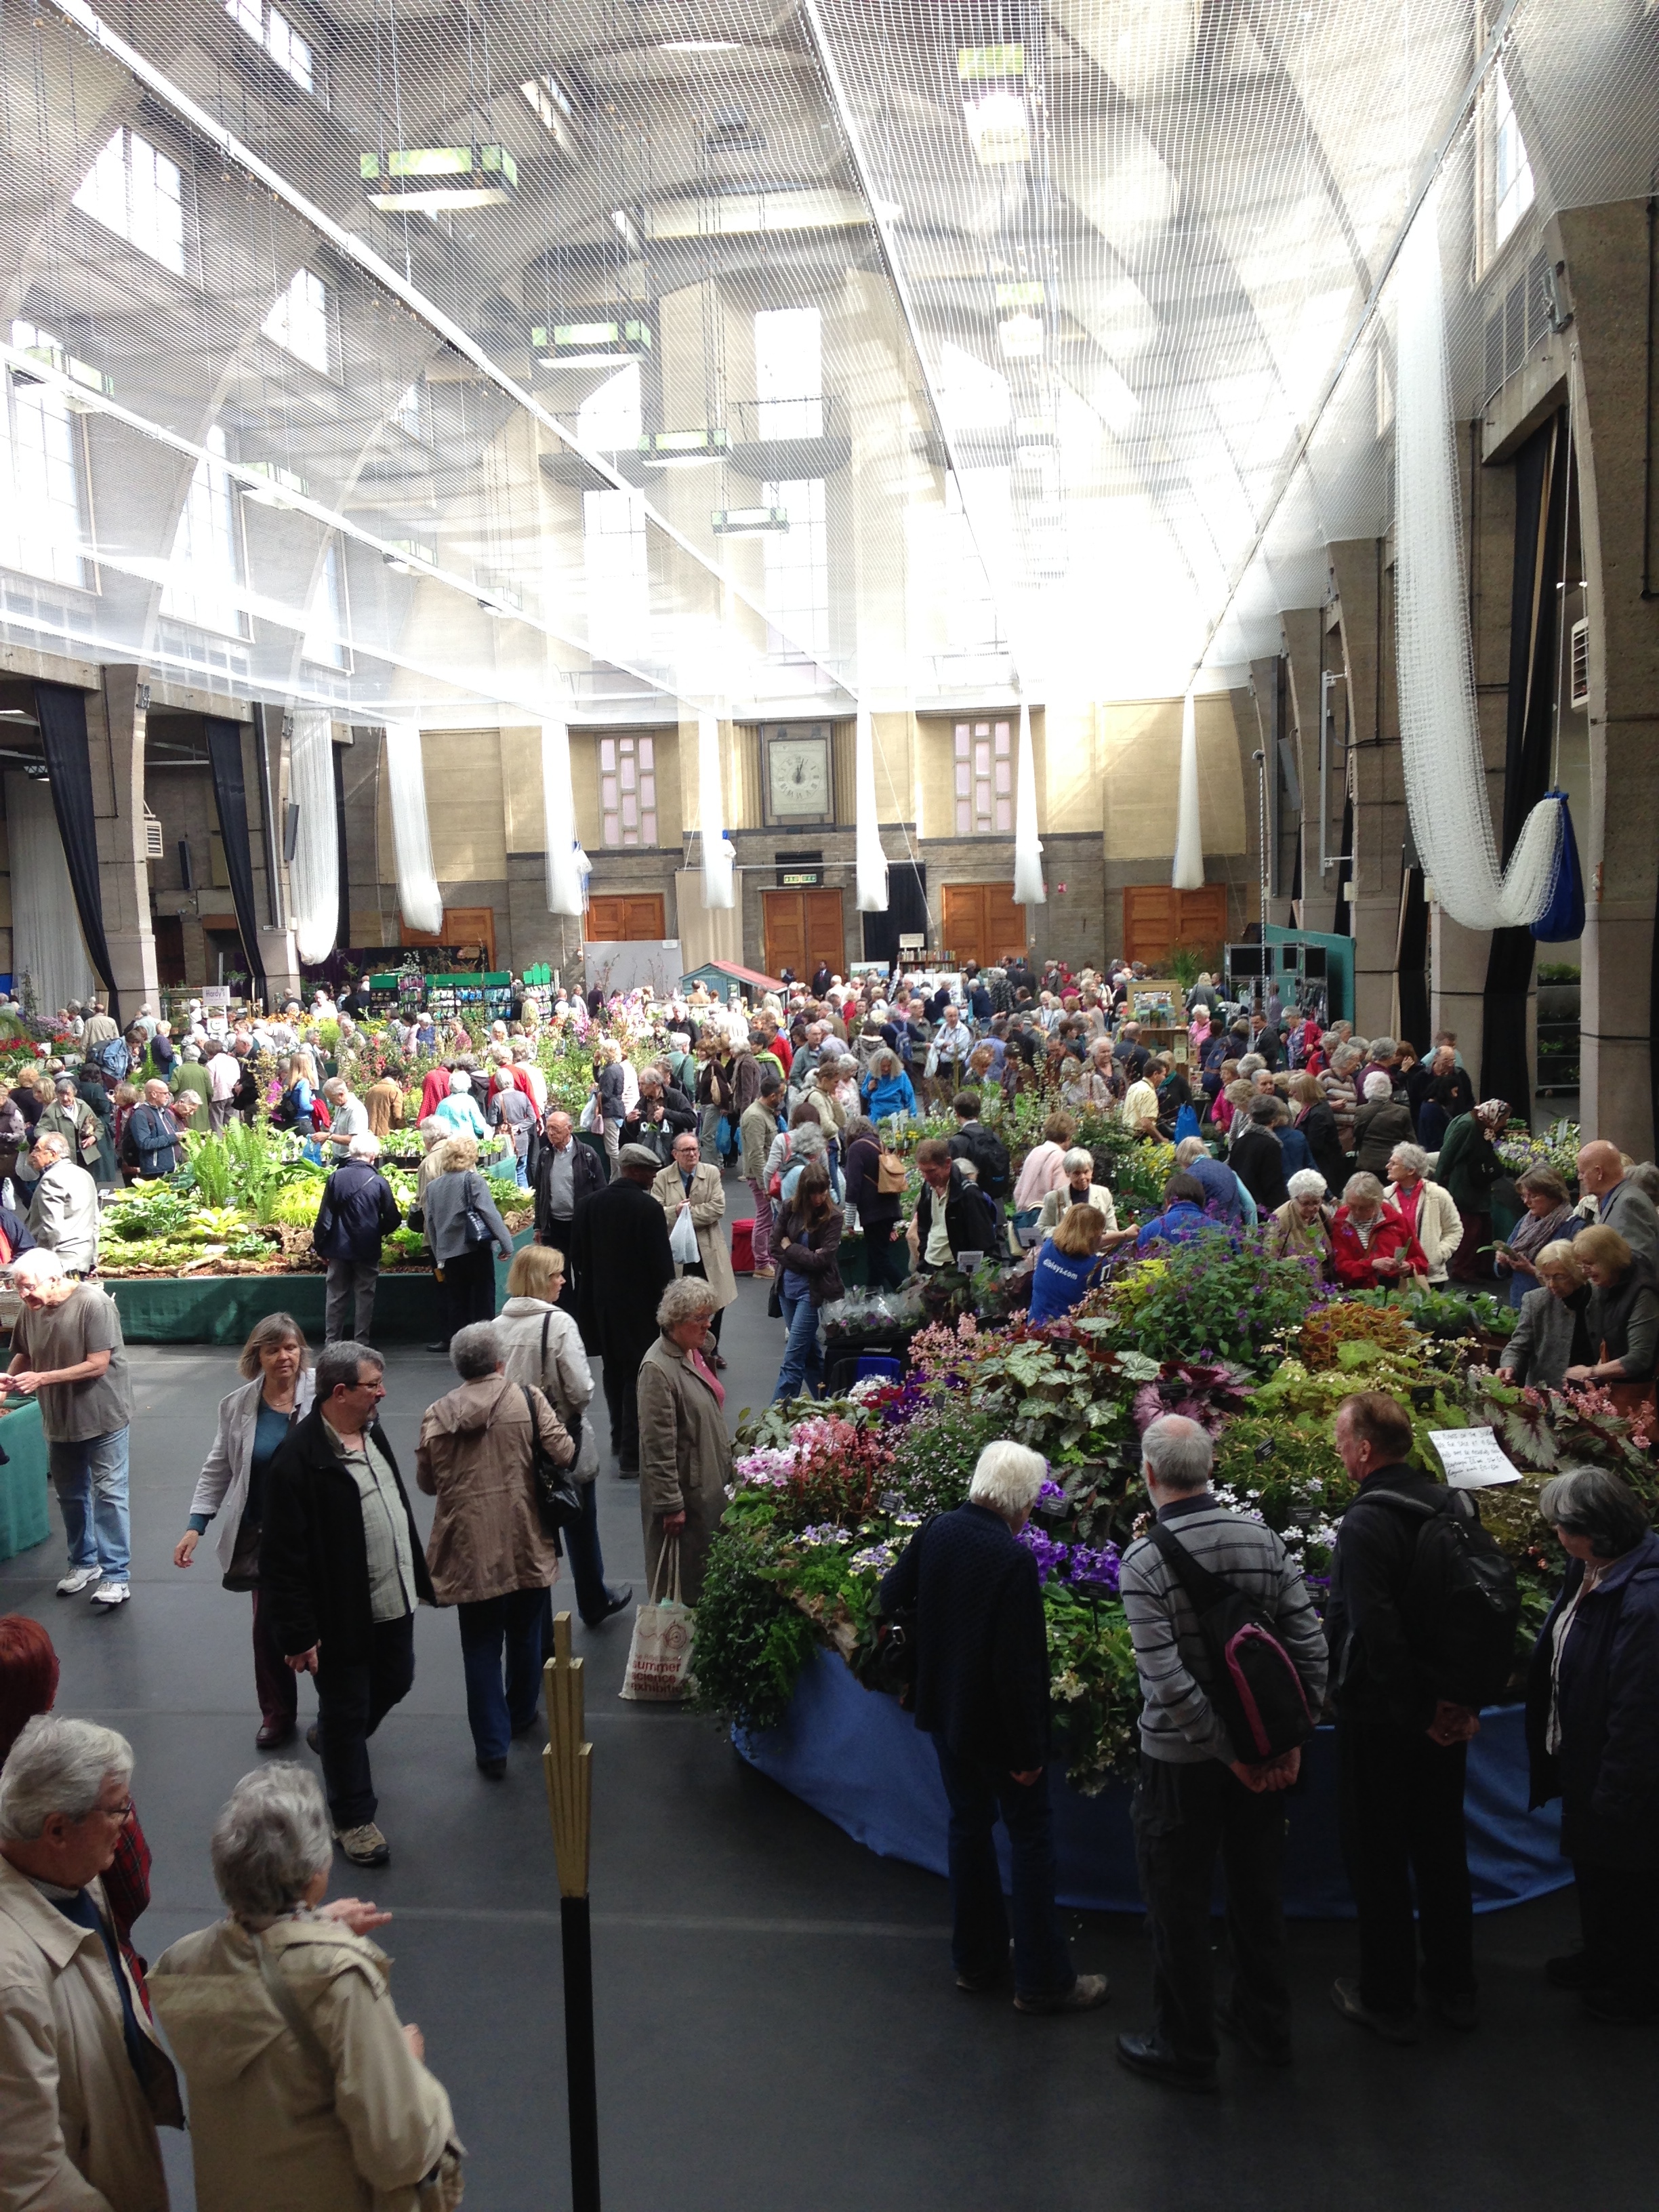
I am a sucker for spring...I cannot tell you how many bluer-than-blue corydalis, whiter-than-white anemones; how many tiny pots of scented pelargoniums I have bought at these shows - they totally see me coming. This year I was utterly sidetracked though, by Agapanthus. Hoyland Plant Centre, who hold the National Collection of Agapanthus, had a stand, complete with a lovely, geeky table explaining the different stages of growth, and (crucially) small plants in 9cm pots, and divided sections of larger plants, which I can actually afford.

IMG_6682

We went upstairs and sat down to listen to Steve give a talk on Agapanthus, and, as usual, I learned more from this twenty minute question and answer session than I'd gleaned from years of reading books or internet. One person with a passion, who knows his subject inside out and is able to explain it in plain English - the whole audience was rapt.

Here, in a nutshell, is what I learned.

There are two different types of Agapanthus. Deciduous and Evergreen. Deciduous are hardy pretty much everywhere. Evergreen need to be in the south (or see below for methods of protection).

Compost.

Needs to be well-drained. Steve uses two parts ordinary multi-purpose mixed with one part sharp sand or grit. Treat them mean. Too many nutrients will produce leaves and no flowers. (see below for fertiliser)

 Root restriction.

The rumours are true; these plants like their roots restricted at first. This helps the rhizome to form and bulk up, allowing for flowering. Obviously they therefore do well in pots. Here is the kind of pot-bound-ness that is perfect for an agapanthus. Don't re-pot until this level is achieved.

IMG_6703

Here's a plant that is too pot-bound and needs re-potting:

IMG_6704

If you want to plant in the ground and the roots are not yet congested enough, sink them inside a pot with the bottom removed.

 Feeding.

Feed regularly with a high potash feed (that's the 'K', or Potassium in your 'NPK' fertiliser; their feed is 30% potash) from March to September. This will encourage flowering.

 Winter care.

Give containers a really good soaking in November, buy a bag of bark chippings and mound them over the crown of the plant (in amongst the leaves if it's evergreen) and, if you can move them, bring them inside somewhere frost-free (evergreen will need light, deciduous won't) for the winter. If you can't move them, wrap the container with bubble wrap and then the whole thing with fleece. If you're in a sheltered area you'll get away without doing this, but if your plant is super-precious to you, then Steve says you should do it anyway.

In the border, just use bark chippings and mound them up over the buds.

 Dividing

Use a knife that's an appropriate size for whatever you're chopping. Steve likes his meat-cleaver. He also uses one of those Nigella-type mezzaluna things for smaller plants. He looks rather better than Nigella wielding the thing. It is a sight to behold. Sorry I didn't get a picture.

IMG_6705

Hack away...these plants are tough, but if you are using something serrated, then be sure to shave the cut with a knife afterwards so that the wound can heal cleanly (it's the difference between having a clean cut and a graze on your skin - clean cuts heal better and quicker. Leave the pieces to heal over for 24 hours before re-planting in the compost above. If you're re-planting in the ground then you don't need to do the plastic pot trick if the plant has flowered the previous year and has flower-buds on it - the rhizome is sufficiently bulky.

Here is the inimitable Steve with some of his cleavers. IMG_6709

I have a container-grown agapanthus that I've neglected for years and hasn't flowered for the last two or three. It's so pot-bound that it's pushing itself out of the container. I was about it release it from its pot, chop it up and re-plant in the border, but Steve says I should re-pot it first in a larger pot, feed and mollycoddle it for another year, and then chop it up, once it's flowering again - invaluable advice, brilliantly delivered.

I bought a beautiful chunk of Agapanthus praecox from Hoyland - an evergreen that I'm going to put with all my other agapanthus  in a special new bed I'm creating....updates soon.


Snowdrops and Happiness

Snowdrops, gone over but not forgotten from Laetitia Maklouf on Vimeo.

I made a little video...many reasons but mainly because I sit around tapping away at my computer for far longer than I strictly enjoy. Doing a video takes less time, and I get to smile at you (yes, all three of you....love you mum, dad, hunk). I like smiling...and thinking aloud.

This one is about what to do with your gone-over snowdrops (yes, either plant them, or give them away). I may do more, if I am not laughed out of town... Thanks for indulging me *smiles*


badge


In other, much more sumptuous news, I'm taking part in a competition with Neom Organics (amazing bath, body and smelly candles company that use only organic ingredients and NO nasties whatsoever). They're celebrating spring with a big Happiness Prize Package. I love their stuff, particularly the candles and reed diffusers which I tend to use in the winter when I'm desperate to be reminded of warmer weather and the wonderful scent of Spring and Summer.

There's a big bundle of prizes on offer (including books by me) - click here, or on the images to check it out, and good good luck!

Oh, and I also have a special discount code for you to use at Neom - just sign up (below), and I'll send it to you....don't worry, you can always unsubscribe when you've got the code...and I'll never ever share your details with anyone else - it wouldn't be cricket.

happiness candle


Take-home Chelsea: Cleve

Remember Chelsea?

I've been meaning to do a few blogs about doing Chelsea at home but, like the British summer, I am slow at getting into gear this year...

A few stand-out things have stayed with me since Chelsea, and they won't go away. I think this is an excellent marker of VERY GOOD STUFF. Hurrah for slowness.

Cleve West's garden for Brewin Dolphin was my instant favourite. Not JUST because of the frothy, billowing planting (which, if you know me at all, was bound to appeal), but more importantly because all that froth had a foil...

...my eyes could dance over bliss, and then have a rest

The planting was staggeringly beautiful (this IS Cleve after all)

Ferns and alchemilla creeping, with irises, euphorbia, poppies ammi and matthiasella holding their hands, and then the whole thing crowned by cirsium and crambe (which wasn't even out, but was all the more beautiful for that...I do love the PROMISE of something don't you?)


To get this at home any time soon is tough without access to a Russian oligarch

...those amazing yew monoliths need years and years of growth and clipping...this is gardening for your grandchildren.

But you CAN do it small, and get the same effect.

This is one of those occasions where if you have little or no space, you win. You can fill a space with these, and get that same sense of majesty and softness because your garden is within each container. In the ground it would just look a bit embarrassing because the topiary would feel too small.


You need:

Container. Make them beautiful. This is one of those times where you should probably pay more than is strictly comfortable. Mine is from Crocus, for whom I regularly review products. Their own-brand terracotta pots are distinctly lovely, with a soft apricottyness about them. Get your pot first and then choose your plants accordingly.

A piece of topiary. Box or yew, but for Cleve-ness, choose dark, mysterious yew.

Some froth. Fine to go and find some frothy bedding like diascia or verbena at the garden centre, but for less faffing next year I'd go for little ferns, alchemilla mollis, or erigeron.

Method:

I use a half and half mix of multi-purpose and john innes 2, and I usually bung in a handful of fertiliser granules if I have them to hand. I plant slowly and carefully because I enjoy it. I water diligently and always put a big saucer under the pot so that the compost can soak moisture up from the bottom. With terracotta pots like these, I also water the outside of the pot when it's hot.

A courtyard full of these, or a long path lined with them? Fabulous.

Slow things...

I love slow things.

Here's something I made almost a year ago, when I was rushing around being very un-slow, filming stuff for telly.

Succulent off-sets, pinched off and squidged into the gritty-compost-filled frog of a brick. (You can get the recipe here).

It was done in haste (and many, many times over, because that's what you have to do with telly). I don't have a 'before' pic and I can't find the clip anywhere...but it is ridiculously easy to do. What I didn't get to mention then (because with telly you can't ever really say stuff that YOU think is relevant) is that a succulent will take its own, very sweet time to spread.

These little babies are the result of almost a year of benign neglect.

I like that.


George and his swamp

I've been meaning to do a quick update on the swamp I made for George back in January.  


Suffice to say, George is comfortable.

Here it was in January:


Also, late to the billion dollar party, I know, but I am finally having a love affair with Instagram (although I do want to add that that THE LENS OF LIFE DOES'T HAVE VASELINE, (or apricotty, 70's filters) so I shall probably fall out of love at some point.

Lavender dayzzz...

The lavender is a-buzzing.


This is one of life's good things.

I have lavender in pots, but my main lavender event comes in the form of twelve L. angustifolia 'Hidcote' plants that edge the ends of my flower beds.

... That fuzzy softness...it needs off-setting with a tidy lawn (or better still, stone or brick).

L. angustifolia is fully hardy, and covered in deep purple, two-lipped flowers (which you can see are not out yet). The is the perfect time to harvest some stems for drying, (although do leave some for the bees - lavender being ultra-rich in nectar). To dry, just gather a handful, and tie the ends of the stems with a rubber band. Hang it in a cool dry place, upside down for a couple of weeks, and then you can make lavender bags, or get creative in the kitchen.

Here's my lavender sugar (same concept as vanilla sugar) for which I plucked about a tablespoon of lavender buds and added them to a jar of caster sugar. I'll leave that to infuse for a couple of weeks and then make biscuits or ice-cream, or something.

If you want to grow lavender in a container (and look how delicious it is with terracotta), choose a large pot, because you want to allow your plant to grow into a great big wafty hummock, and make it a beautiful one too, because lavender is no flash-in-the-pan plant, and then just mix up some peat-free multi-purpose with John Innes no 2 and keep it watered (though not fed).

Of course, angustifolia is not the only lavender - there is L. x intermedia (often known as English lavender), which is rather smaller, and with rather more rounded leaves, and then there is L. stoechas (or French lavender) which has those funny bunny-eared bracts, - deeply chic, but do watch out, because it is only borderline hardy, and a hard wet winter will nuke it good and proper.


It's nice to sprinkle dried lavender on the floor, or on a table near a lighted candle for scented winter evenings, although with the extended winter we have just endured, I have been using Charlotte and Co's exquisite scented candle from their collection of lovely lavender things, which took me straight to summer whenever I used it. I also have their pillow spray, to which I have become rather addicted, because I am convinced it helps me get to sleep faster, and dream about good things.

I rather long to be a person who wafts around in a silken dressing gown....perhaps this is my little piece of that...silken..ness.

But back to reality...I can't post on lavender without sharing how I prune. This is pretty much the only plant in my garden (bar box) that I am fiercely strict with when it comes to chopping. The problem is that if you don't do it, then you lose that gorgeous mound-thing and you pretty much have to start again with a new plant.

So...when the flowers are over  and the bees have had their fill, I cut them all off, (down to the top of the leafy bit of the bush).

Then, at the end of September I chop the whole thing down brutally to about one-third it's original size:

...just like this. You will hate yourself, and it will feel terribly wrong, but it's not wrong, it's right. This way your plant will never get leggy or woody. It will always be like a soft, purple pouffe.

x

Bunny tails, realised

Just a quick one to show you those bunny tails I planted with Babety way back when. ...Yet another illustration of the fact that plants will pretty much grow, no matter what you do, or DON'T do to them.

..by which I mean:

that the seeds were less scattered than plonked

that the watering was slapdash, and sporadic

that the whole thing dried out to a crisp during the heatwave

that the plastic tub was dropped, and up-ended, and the contents splattered all over the floor, and had to be shoved back into place...MORE THAN ONCE.


...and, no doubt, more felonies that I am conveniently forgetting to mention...you get my drift.

I have never met a plant with such exquisite feel-appeal. I wish I had sowed squillions....for my garden.

My mother's camellias

...She hasn't space for bushes...so instead she wall-trains them.

...It takes a while....

These have been here for as long as I can remember - (the pink one was given to my mother at the birth of my older brother)....What I'm trying to say is that they're older than ME.

I don't remember them ever flowering so abundantly as this year.


...leaving a trail of luscious bounty....


Too many blooms to carry indoors, (like so many precious babies) and float in bowls


...So they get used to anoint topiary...'n stuff.


I'll write a recipe for this one-pot-wonder once I've grilled my mother on her secrets.

a bientôt

x

Something to soothe

  Never parTICularly been one for an 'erbal infusion' (unless it's lemon verbena or peppermint)

I'm far more likely to munch leaves or a flower in a salad...

or cover it with sugar and put it on a cake...


... but stuff's wee bit stressy at the moment, and I went out to pick a tiny posy because I thought it was something rare, and non-computer-based...and then I found myself marvelling at these pretty things, and I picked up Jekka's Herb Book, and it said  that a tisane acts as a 'mild sedative'...'good for anxiety and insomnia', so I chucked some leaves and a flower in a cup.

Primula vulgaris are mighty easy to grow, particularly if you have a deciduous tree kicking around, under which they can live in a nice, moist, partly shady world.

Wild primroses are less common than they should be, so don't pick them unless there are absolutely loads, and certainly don't pull them up by the roots.

Colours vary from the palest of creams to much deeper, eggy yellows, and look how pretty the buds are:


You can grow them in a pot - just use JI No2 and water regularly, and you can divide them in the autumn if you've got big clumps.

The scent is sweet.

I think the small bottle of blooms did more for my jitters than the tea

My new book is coming out soon - and people - (people I admire and respect) are being SO nice about it. This is totally wonderful and deeply gratifying and NOT what I expect...So thank you English Mum and Fennel and Fern.

This site came under attack a while ago and I basically lost the whole caboodle. It was the brilliant Neil who resurrected it, and who is now helping me to improve it. My beloved Lust List has completely disappeared and I am re-writing it (slowly but surely...a little bit every day....). I am hoping to have it back up soon as poss.


February bells

Muscari (Grape Hyacinth) are out in the shops right now. You should plant bulbs in autumn and LOTS of them...in which case you could do a lot worse than create a river like this one at Keukenhof (oh to see that one day).

But for those of us with a little less space, they are perfect for a container, a window-box, or any piece of glorious china you happen to have at home...just employ a bit of judicious 'plonkage' and cover any plastic pot bits with sphagnum moss. Indoors, they will go over quicker, but frankly who cares?

They are perennial bulbs, which means they'll come back year after year for you and have these tiny little urn-shaped flowers. They come in deepest cobalt, and also white and lilac (but honestly, why on earth would anyone want anything other than blue?).

Desperate measures

I don't tend actively to involve my daughter too much in my gardening - Children command all your attention, and I am not Dawn Isaac...(although I'm trying...very, VERY hard to be).

But I had one of those desperate moments the other day - the sort where you have to kill 30 minutes, and every toy has been played with, and illness is preventing a proper walk, and you're just out of ideas....

generally...

...in life.

So that's when I remembered this, from Homebase, where you buy what looks like a takeaway coffee cup, with compost and a packet of seeds (these are bunny tail grass) inside. You're supposed to sow the seeds with your child, put the lid on, so it becomes its own propagator, water, watch and wait.

She loved it.

...loved doing the seed sowing thing, and every morning she wants to look at it, to see if it's germinated.

It's not like I haven't sown seeds with her before...(we did some peas in the summer)...but I think the attraction of this was partly the packaging, and the fact that she has ownership of this colourful paper cup with its own lid. #simplepleasures

It's an easy way to do the gardening thing with her when I just don't have it in me to gather all the necessary bits and pieces...I'll be buying more and putting them in a cupboard, in exactly the same way that I store lollies....for emergencies.


A swamp for George

Soleirolia soleirolii - the perfect bathroom plant.

I've been using these lovely creeping emerald droplet-leaves for years now, both indoors and out.

Outside, they do this tight-knit, softening thing - the leaves are slightly tougher and darker, and none the worse for that. I long to take a machete to the cement between my paving stones and let it do its thing.

Some people regard it as a nuisance, but (as I've said many times before) nuisance plants are my kind of deal, for obvious reasons.

Indoors, it's a very different proposition. You can put this plant in almost any sort of container and it will thrive. The warmer it is, the longer the creeping stems will become, and the softer the cushioning.

I have this hideous window in my bathroom, and found a tray thingy in one of the big sheds. I thought I'd make a place for George the crocodile (Schleich toy of the moment) to hang out, and decorate this desolate window-sill (although I'm not sure you can even call it that).

You need:

1 x Soleirolia soleirolii plant - available at good garden centres in little pots. Sometimes it's sold under the name 'Helxine', sometimes 'Mother of thousands', sometimes 'Baby's tears' (ahhhhhh). I've never seen it sold in any of the big shed ones (silly billys, because it would fly off the shelves)

A container - anything you want, but you'll need drainage holes, which is why I had to drill some in my tray. I drilled three large holes with a fat drill bit that had a point on the end of it. It took a grand total of ten seconds...but if you hate stuff like that, then just use an ordinary pot or pots - terracotta is nice.

Some multi-purpose compost - try to find one without too many huge bits of bark in it. But if you can't, then just remove them when you come to fill your pot. This is simply to create the best environment for the creeping stems to attach themselves and put down roots.

A drill, to make holes (if you need them)

Method.

Fill your container with compost, right up to to the top. You don't want to be leaving a gap between the top of the compost and the rim of the pot because this plant's M.O is to 'spill' over the edge - it's very very pretty.

Now remove your plant from its plastic and divide it gently into little pieces. How many depends on the number of containers you have to fill, but know that it only takes the merest suggestion of leaf and roots, planted with care and attention (or not) to get this plant started and within weeks it will have covered the surface of the compost.

Of course, you could just buy enough to fill your entire container and have the finished product right there and then...no harm in that, except watching things grow is more fun.

Plant your pieces, making sure that the roots go in your compost, and the leaves remain above it, but generally you can be quite slap-dash and just squish it in.

Water well from above with a watering can that has a rose attached to give you a gentle shower of water, and from below also, by putting your container into another one, filled with water, and leaving it there to soak.

Keep the compost damp at all times (which isn't hard, in a bathroom, is it?)


Comforts

This lovely thing is soothing my heartstrings right now. I made it in October last year, having bought rather too many hellebores. I wish I had made more - it's one of those all-year-round pots to which you do precisely nothing, and it sits around looking gorgeous in spite of that.

Bruised, sober, ever so slightly funereal...but with bulbs in it, symbolising hope (?)...okay, I'll shut up now - suffice to say, we are one year on from this. Tricky.

Here's how you do it:

So here's the thing -

I love cyclamen and pansies as much as the next person

...and I have buckets of them everywhere...

...but right now I'm in the mood for something that'll go the distance with me...

Here's a lovely pot that will remain lovely all year round. I've been growing hellebores in pots and window-boxes ever since I began gardening and they are completely low-maintenance and trouble-free. I've added some bulbs to this pot for spring zing, but a hellebore and some pretty ivy is enough for me...enjoy.

You need:

1 gorgeous hellebore...they're on sale now and there are a squillion different permutations 3 little ivy plants 5 dwarf daffodil bulbs A pot (mine is 30 cm diameter) Some multi-purpose compost, mixed half and half with John Innes no. 2, because this pot is not a flash-in-the-pan part-time lover...it's a keeper.

Simply fill the pot with compost half full and put a circle of bulbs around the edge. Place your hellebore in the centre and fill in the gaps, squidging your ivy into the sides as you go. Don't worry about the bulbs getting through...they always manage somehow. Water it thoroughly and enjoy x

Post-party paperwhites

More bulbs, I know, but hey, this is seasonal stuff...and I'm not going to argue with that.

I usually put a load of paperwhites (little daffodils, highly scented and prepared to flower indoors over the winter) into containers in late October for Christmas blooming, but, as with the rest of what I've been doing this year, everything went a bit squiffy this autumn because I've been finishing my book...c'est la vie.

The last paperwhites are available right now in the shops. You can put them in ordinary compost or bulb fibre, but I like growing them in deep vases which reduces the need for twiggy support (indoor stuff tends to flop over eventually because we live in the warm).

You need:

Some paperwhite narcissi bulbs

Some glass vases

Some sort of 'mulch' (stones or marbles or gravel) I've used slate, which is...yeah, 'interesting' and not the prettiest thing on the planet, but I happened to have it to hand.

Method:

First, wash your mulch (my slate chippings were covered in dust, which would turn the water brown (no thanks)

Fill your vases with a layer of your chosen mulch (6-8cm is ample) and then fill with water so that the water comes just level with the top of the mulch.

Now place your bulbs a-top your stones or whatever. Soon, their clever roots will 'feel' that there is water below, and start growing downwards. The long stems will grow upwards, supported by the sides of your chosen container.....and then there will be those blooms....and that scent...Delish

Take back your mint...

...Take back your pearls....

It just turned chilly enough for me to wish I was on the beach wearing a bikini.

...and mint is THE thing to evoke the freshness of summer.

Here's how to have it over the winter.

You need:

1 mint plant (do you already have one? You probably think it's died...It hasn't...It's just having a bad hair day, because it's winter).

1 pot, with holes in the bottom

A bit of multi-purpose compost (peat-free please)

Some horticultural grit, or pea gravel.

Method:

Take your plant and knock it out of its pot, or yank it out of the ground (whatevs, just get a nice bit of root...long and squirly).

Cut the root into small bits, about 2cm long.

Now fill your pot with compost, just a couple of centimetres shy of the rim, and lay the root pieces, 2-3cm apart, on the surface.

Cover the root cuttings (for that is what they are) with grit or gravel, water the whole thing, and leave it inside your kitchen windowsill.

Magic will happen...and soon (the above photo and the one below were taken exactly 14 days apart) There is nothing quite so lovely as seeing those pale green hairy leaves peeping up at you - just keep the thing watered and you'll have mojitos for Christmas.


Violet's Spoon


I never knew anything called 'stir-up Sunday' existed until I saw it on Twitter.

Is it an American thing? Why have I missed it? Possibly because my mother (very sensibly) buys her Christmas Cake from a SHOP.

Anyhow, I'm a sucker for family stuff like this (well, I'm in the first bloom of motherhood aren't I)...so I did the cake thing, and we stirred....

and wished with eyes tightly closed...

And because it is a CEREMONIAL type of stirring, I dug out Violet's spoon.

Violet's spoon was given to me by my cousin Paula when I got married. It belonged to her grandmother (Violet) and is more a weapon than a spoon really.

It is vast and long-handled and great for doling out food when you've got friends round, because you can serve someone at the opposite end of the table without getting up from you chair....(very lazy).

I love it.

...so as I was stirring and wishing, I knew I had to celebrate the spoon a bit more...

You need:

A spoon like Violet's (or, obviously, any shallow bowl-like thing). See here for more suggestions

Some sempervivums or other succulents. I have babies a-plenty from this project, but you can find them in the better garden centres (the ones that haven't removed every single plant and replaced them with yawny christmas things).

Multi-purpose compost

Horticultural grit or gravel

Method:

Carefully select a few choice rosettes, nipping them from your plant with your fingernails - (the babies shooting outwards from the main mother rosette are perfect for this, but if your plant doesn't have any then just carefully pull a whole rosette off your plant, remove the bottom two layers of leaves so you get a 'stalk' and use that.)

Put a small amount of compost in the spoon or whatever you are using, dampen it slightly with water so that it's moist but not wet (turn the whole thing upside down and squeeze any excess water out through your fingers if you add too much).

Now just poke your rosette or rosettes into the compost, and finally fill in the gaps with gravel.

Display. (I will be displaying Violet's spoon indoors in a bright place over the winter, and then re-planting the semps outside in the spring).

Watering. I'll be watering Violet's spoon with a tiny smidgin of water every couple of weeks, but only because they're indoors. My outdoor ones get nothing at all...ever.


My thanks to English Mum for posting about stir-up Sunday...Her cake recipe is here and looks fabulous. I used my favourite cake book of the moment, Pam Corbin's River Cottage Cakes, because I happened to have it in my handbag when I was a the supermarket (yes, you read that right...it is hand-bag size). Her Christmas cake recipe is called 'The Mother Cake' - brilliant name.

Cyclamen wedding cake


All of us...(oh, not you then...?) okay, but MOST of us have one of these thingys lying around.... a wire cake stand, that is...

After the initial 'ooooh, that's purdy, I'll so USE that for all the, CUPCAKES I make!', mine ended up in a cupboard just TAKING UP SPACE.

So I thought I'd use it for some kind of confection of cyclamen, which, let's face it, are the only thing widely on sale right now everywhere.

You need:

A cake stand like mine, preferably one that's annoying you.

Cyclamen. For my cake stand, I used 6 little plants (all on sale, because they were in a sorry state, and I had to save them). You could also use little ferns, or little pots of ivy, or pansies.

Multi-purpose compost

Sphagnum moss, which comes in sheets - perfect for lining anything that is holey, and prettifying anything that is ugly.

Method

Line the wire stand with moss so there aren't any gaps. Now remove the cyclamen from their pots and squish them in, using extra multi-purpose if you see any gaps. Water it and disPLAY. I put a candle in the top bit, but chocolate fingers would be even better (or of course, another cyclamen).

You're going to need to put the whole thing on a big plate or tray to catch any bits. Keep the plants watered so that the compost remains moist but not sopping. I take the whole thing outside and let it drip out before I return it to the table. I tend to water cyclamen quite carefully because if you let big droplets linger on the leaves or stems then they often rot. To avoid this, I use a watering can with a thin nozzle and stick it under the leaves so that I only get water on the compost.

And last but not least, remember to dead-head. This will give you more flowers....

...and you'll like that.

x

Potted Sunshine

This weird warmth highlights the fact that temperature has nothing to do with my feeling iffy at this time of year...it's all about light levels.

So here is another better-making series of things, for when you're feeling a bit Novemberish.

This time I'll be adding some non-planty stuff to each post...because there are things I like OTHER than gardening....(just saying).

There's a voice in my head...it sounds a bit like Kelly Rowland (no, I don't know why)...and she's saying:

GIRL....

....plant some bulbs.

You do this by getting hold of some bulbs and burying them in compost....IT'S THAT SIMPLE.....really.

I have been VERY naughty and bought some READY PLANTED ONES (It's okay, no-one will know - these are Narcissus 'Geranium') and put them in a basket with my faithful friend sphagnum moss. I found these at Clifton, where I was lurking today. Looking at this basket reminds me of Easter. I like that.

...get your toes done.

An instant heart-gladdener. I know it's winter, and nobody sees my toes....but I see them, and, well, I'm SOMEBODY. Colour: Chanel 307 'Orange Fizz', because it sounds like a petunia cultivar, and it makes my feet look tanned. I like that.


...do something nice.

I went here, and clicked on 'donate'. Seeing the pictures made me giggle, and doing something (however small) about godawful cancer made me feel good. I like that.


Scent for a rainy day...

A big basket of hyacinths, for those prepared to play the long game...Normally you'd be doing this in September for Christmas blooms, but, well, I forgot...and at any rate, who needs MORE stuff at Christmas? - It's the bleakness of January and February I want hyacinths for.

You need:

Hyacinth bulbs (available now, but selling fast) I like 'Carnegie' or 'Jan Bos'. Protect your hands when you're touching them...some people are hyacinth-bulb-allergic.

A basket (lined with plastic) or other container - the large one here is 35cm diameter

Bulb fibre (but if you can't get it, then multi-purpose is fine)

Something to cover the container with so that the bulbs stay in the dark...I use a deep plastic pot saucer

Method

Just plonk your bulbs in, leaving the tips uncovered, and then water the whole thing, cover the containers with something to keep things dark, and leave it somewhere cool and dark (I use my basement, but if I had a garage I'd use that). Check the bulbs periodically to make sure the compost doesn't completely dry out and wait until the shoots are about 7cm high (this could take anywhere between two and four months....you're simulating late winter and early spring - tricking the bulbs into coming up when you want them to.

Bring them out into the light and relative warmth of your home and they'll burst forth with their glorious scent before you know it.

Enjoy x


Sexy salad...after.

My beautiful nasturtiums which I sowed in window boxes back in June and have been glorifying my very boring side return for months now got trampled by something or someone yesterday, and I suddenly realised I hadn't posted a photo of the 'finished product', so to speak.Luckily, I had taken some a few weeks ago...(unfortunately AFTER I had pillaged the plant for peppery kicks...but you get the idea) These would have gone on and on until they get nuked by frost All I have done is water them...that's it.

Here's the recipe to remind..but obviously, don't sow yours till next year now...

You need A container Multi-purpose compost with a few handfuls of grit added Nasturtium seeds

Method Fill you container with compost and push in your seeds, 12cm apart and 1.5cm deep.  Cover them with compost and water the whole thing well so it gets thoroughly soaked.  Your seedlings will appear in a couple of weeks.  Let them grow on for a couple more, and then steel yourself and pull out half of them so that each plant has 25cm of space....Brutal but necessary (sorry).

Never ever ever EVER let the compost dry out.

Enjoy your day-glo cascade

Squish black-fly as and when they appear, or hose them off with a jet of water, or spray them with a weak washing up liquid solution....Just don't do nothing, because the critters are sap-suckers and, well, you want your flowers to bloom bodaciously don't you.

Have fun lovely ones.