Sexy salad

I've got the drabbest, emptiest, saddest side return ever.  I was going to make it over for Love Your Garden but stuff happened, and the idea was scrapped.  I've decided to do it anyway, but not right now....right now I'm going to fill the troughs that I had ready for the transformation, and because I can't afford the plants I really want to put in them I'm going to.....  

Sow some nasturtiums (or, moustarshalumps, as I think Pooh calls them).

This is really the last possible moment for it, and they are the most ridiculously easy thing to grow in the world.  You can use anything to grow them in, (as long as you water the things), but they're best raised up high because like clowns, they adore to tumble. The leaves are as beautiful as the flowers (if not more so) and yes, this is an edible plant, (flowers and leaves), so munch munch munch away. Quite the sexiest thing you can do to a salad methinks.

You need A container Multi-purpose compost with a few handfuls of grit added Nasturtium seeds

Method Fill you container with compost and push in your seeds, 12cm apart and 1.5cm deep.  Cover them with compost and water the whole thing well so it gets thoroughly soaked.  Your seedlings will appear in a couple of weeks.  Let them grow on for a couple more, and then steel yourself and pull out half of them so that each plant has 25cm of space....Brutal but necessary (sorry).

Never ever ever EVER let the compost dry out.

Enjoy your day-glo cascade

Squish black-fly as and when they appear, or hose them off with a jet of water, or spray them with a weak washing up liquid solution....Just don't do nothing, because the critters are sap-suckers and, well, you want your flowers to bloom bodaciously don't you.

Have fun lovely ones.  I will post a picture of mine when they are up and blooming; in the meantime you will have to be content with this...bit silly but, well, I AM a bit silly.

x

Something for the weekend

Perhaps it's the weird weather but everything in the garden centres seems so have gone over so badly that it's beyond useable.  Not good news if you want to do something gorgeous to your window-box or terrace this weekend, unless, that is, you go for something that looks fabulous all the time.

Sempervivums are just perfect for year-round table-top glamour.

Even better, they need practically no care and attention whatsoever.

I have a tableful, planted in various shallow containers (semps are perfect candidates for crevices and crannies - they love to live between roof tiles which is why they're called 'houseleeks')

I've got an urn that's not much good for any ordinary plant because the sides are so ridiculously shallow.  I used to grow ivy in it but I got bored, as you do, so I used it for this project, but honestly, you could use anything, from plastic pot saucers with a hole or two punched in the bottom, to the hollow of an old brick...up to you.

You need:

1 container of your choice - terracotta or something porous is best because these plants need to stay dry.  A hanging basket, suspended at eye height is another nice way to display them (see above)

Small pots of different sempervivums - number depends on the size of your container but make sure you leave plenty of space between them when you plant, because they're going to spread.  If you want to get geeky, (and treat yourself), then there's no better place to go than here.  Always remember that semps are like jewels -  you can never have too many.

Compost - I use a mixture of one quarter John Innes No 2, one quarter peat-free multi-purpose and one half horticultural gravel or grit (see below) This will produce a very free-draining soil for your semps

Small horticultural gravel or grit -available in bags at the garden centre

Broken pieces of polystyrene, or terracotta pot to lay over the drainage holes if you are planting in anything but the shallowest of containers.


Method

Mix your compost, throw a couple of crocks into the bottom of the container and fill it to the top with your mixture.  Now carefully remove the plants from their plastic and plant them firmly in their new home.  Make sure your semps are a couple of millimetres proud of the top of the compost so that their leaves don't touch it too much.  You can even mound the compost up in the middle of the container if you like, to get that vesuvial look.  Leave ample space between your plantings to allow the plants to spread.  Each 'mother' plant (the hen) will produce lots of 'chicks' which are attached to her by stems.  Eventually the mother rosette will die (just remove it carefully when this happens) and the chicks will carry on growing...it's a beautiful thing.

When everything is where you want it, water the pot and then cover the gaps between the plants with gravel (I pour it into the gaps, using a plastic measuring jug) which will soak up any extra water on the base of the rosettes. I like to plant semps on a sunny day because they the rosettes dry out quickly from their initial watering, reducing the risk of rot.

That's it...water just occasionally to keep the compost from completely drying out (although if you do forget, they won't hate you). You can leave them outside all year round - don't water them at all in winter.

A promise, kept

Back at the beginning of the year, I planted a pot of little alpines to make me feel better, and I promised to post a photo of it when it had flowered...Here it is.

Here's the before shot....no less pretty methinks....

...and the plant list: Jasione laevis 'Blue Light'

Ajuga reptans 'Braun Herz'

Sedum 'Cappa Blanca'

Erodium 'Bishops Form'

Sedum reflexum

Cyclamen neapolitanum

Has it made me feel better?....well, let's just say it's impossible to be sad when you've got an erodium peeping up at you, so yes, it has.

x

Better-making things 2: A six-pack in a pot

Here's the perfect pot for January - a little sea of perfection with the promise of tiny blooms. I love picking up an alpine six-pack from the garden centre.    Making this pot was the first bit of gardening I did after the horror.  It helped, somehow.

Gorgeous, even without flowers...

To make a little pot of alpines you need:

One terracotta pot, shallow and wide - or you could use one of those lovely tufa tubs

Multi-purpose compost mixed with a good few handfuls of horticultural grit to make your alpines feel at home

More horticultural grit, or pea gravel to top-dress your pot

A selection of darling little alpine plants (I get mine in a six-pack from my local garden centre).  This time they were:

Jasione laevis 'Blue Light'

Ajuga reptans 'Braun Herz'

Sedum 'Cappa Blanca'

Erodium 'Bishops Form'

Sedum reflexum

Cyclamen neapolitanum

Method

Simply plant them (being especially careful with sedums as they are so brittle) and cover the surface of the compost with a layer of grit or pea gravel, which will keep things nice and dry up top so the leaves of the plants don't get sodden and rot.  Water the pot well and put it on a table or somewhere you can see and appreciate it and where it will get full sun.  These plants don't care about the cold, but they don't like the wet, so if torrential rain is forecast, I tend to move the pot somewhere out of the impending deluge.  I'll post a photo of this when it flowers.

One-pot-wonder: An October offering (not pansies)

So here's the thing -

I love cyclamen and pansies as much as the next person

...and I have buckets of them everywhere...

...but right now I'm in the mood for something that'll go the distance with me...

Here's a lovely pot that will remain lovely all year round. I've been growing hellebores in pots and window-boxes ever since I began gardening and they are completely low-maintenance and trouble-free. I've added some bulbs to this pot for spring zing, but a hellebore and some pretty ivy is enough for me...enjoy.

You need:

1 gorgeous hellebore...they're on sale now and there are a squillion different permutations 3 little ivy plants 5 dwarf daffodil bulbs A pot (mine is 30 cm diameter) Some multi-purpose compost, mixed half and half with John Innes no. 2, because this pot is not a flash-in-the-pan part-time lover...it's a keeper.

Simply fill the pot with compost half full and put a circle of bulbs around the edge. Place your hellebore in the centre and fill in the gaps, squidging your ivy into the sides as you go. Don't worry about the bulbs getting through...they always manage somehow. Water it thoroughly and enjoy x

A september offering

Sorry there was no August pot....I was too busy doing nothing.  To compensate, here's two for the price of one:

It's all rather bulbous - but if you like gardening, then that's what autumn's all about.

This pot doesn't look like a huge amount of anything on top - in fact, what you see above is just an afterthought really.  I had a pelargonium left over from loads of cuttings I took last year and thought I'd give it a chance to shine.  What's really going on here is the bulbs...and for them, you'll have to wait.  I utterly promise you, it'll be worth it.  In addition to the scented leaved pelargonium, you're going to get a crop of delicious Mizuna leaves, then a March-April flowering of little daffodils, followed by an April-May flowering of delicate yellow and white dutch iris.

For this pot you will need:

A pack of dwarf daffodils (I used Narcissi 'Minnow')

A pack of Dwarf irises (my pack says 'Dutch Iris...no idea about them but they were on special offer)

A packet of Mizuna seeds (or any other oriental salad leaves that like to be sown in the late summer)

A small scented leaved pelargonium (You can find these languishing in dark corners of good garden centres at this time of year).  This is really just to give you something to look at for now - if you can't find pelargoniums, then just substitute with a smattering of pansies, or anything else that looks good right now.  Don't plant too densely though...you want to leave space for those bulbs to push through.

A large-ish pot - mine is 50 cm across at the top.

Multi-purpose compost

Method:

Fill the pot with compost until there's 10cm left to the top of the pot.  Now put in your daffodil bulbs - quite close together but not touching.

Now cover the bulbs with another 5 cm of compost, shove in your chosen 'see me now' plant, and surround it with your iris bulbs.

Fill in all the rest of the space and water well but gently, with the fine rose of a watering can, until you're sure the water's coming out of the bottom of the pot.

Now sow your mizuna seed - thinly and carefully around your pelargonium, covering the seeds with a smattering of compost and patting down comfortingly, to make sure the seeds are in contact with the compost.

Keep it watered, and protected from naughty squirrels and this pot will give you delicious winter leaves, as well as joy well into summertime next year.

P.S. There are so many other bulbs out there - here's another pot I've done with dwarf tulips and muscari (and mizuna too)...take a look at your garden centre, note the flowering time and double, or triple up accordingly xx

A July pot, made from left-overs

This was the result of my terrible habit of buying sad-looking plants that nobody wants.  The nicotiana was about to flower - the leaves were all torn and it was therefore reduced (I like anything reduced) and the lobelia had suffered from having missed the garden centre spray a few too many times and was wilted and languishing, all shrunk up in its polystyrene cells.  I took both home and plonked the nicotiana in the middle with three of the healthiest lobelia around the edge.

The lobelia recovered almost instantly, but the nicotiana took a little longer to grow some new leaves at the bottom (they are so brittle that they almost never survive a garden centre without being decimated).  That's why this offering is two weeks late - the pot was in intensive care.  Here it is, good as new and giving out that intoxicating evening scent.

Delicious no?

Here's what's in it

you need

1 Nicotiana sylvestris

1 pack of lobelia bedding

Multi-purpose compost

1 pot - mine is 30cm diameter

Keep it watered and make sure you place it near a door or somewhere you're likely to spend some evening time chilling out - the scent only comes out to play at night because the flowers are mostly pollinated by moths.  This is also why the flowers glow seductively in the dark.  Now I think about it this is a rather good pot to have around if you're trying to get someone to snog you.

x

A June offering

Here's a pot with the scent of summer inside it

A lovely, scented summer pot that will take you well into autumn. I've used a scented leaved pelargonium. I have no idea what it's called, but any scented leaved beauty will do. This is one of my favourites, with little delicate flowers and velvety leaves. I keep it fresh every year by taking cuttings. This one is a cutting I took very early this year in January. I love that about Pelargoniums - you can propagate pretty much all year round. I'll do a little how-to video of this as soon as I can persuade The Hunk to film me.

Lemon Verbena is one of my favourite plants ever...and if you're keen on scent, like me, then I urge you to go out and find one. It's the most lemony scented thing in the world, and a great thing for a pot. This one is a new plant that I bought in a tiny pot because I lost my old one in the harsh winter we just endured. If things hadn't been so horribly cold, I would have used the old one, which came back and back to delight me year after year.

You need: 1 scented leaved pelargonium 1 Lemon verbena plant 1 pot (mine is 30cm diameter) Multi-purpose compost

I don't feed it, or do anything complicated, just make sure it's watered...that's it.

You'll need to bring this inside when the cold weather arrives, and the pelargonium won't last forever in it's lovely leafy state, so it's best to take a cutting and start it again for next year. You can find out all about Lemon verbena and scented leaved pelargoniums by reading my eulogy to them in my book...but the long and the short of it is that you can use them for puddings, cakes and tea, and to freshen your breath, and just generally to brush past and enjoy for their delightful scent.

A little bit spikey, a little bit soft, and a little bit Alys...

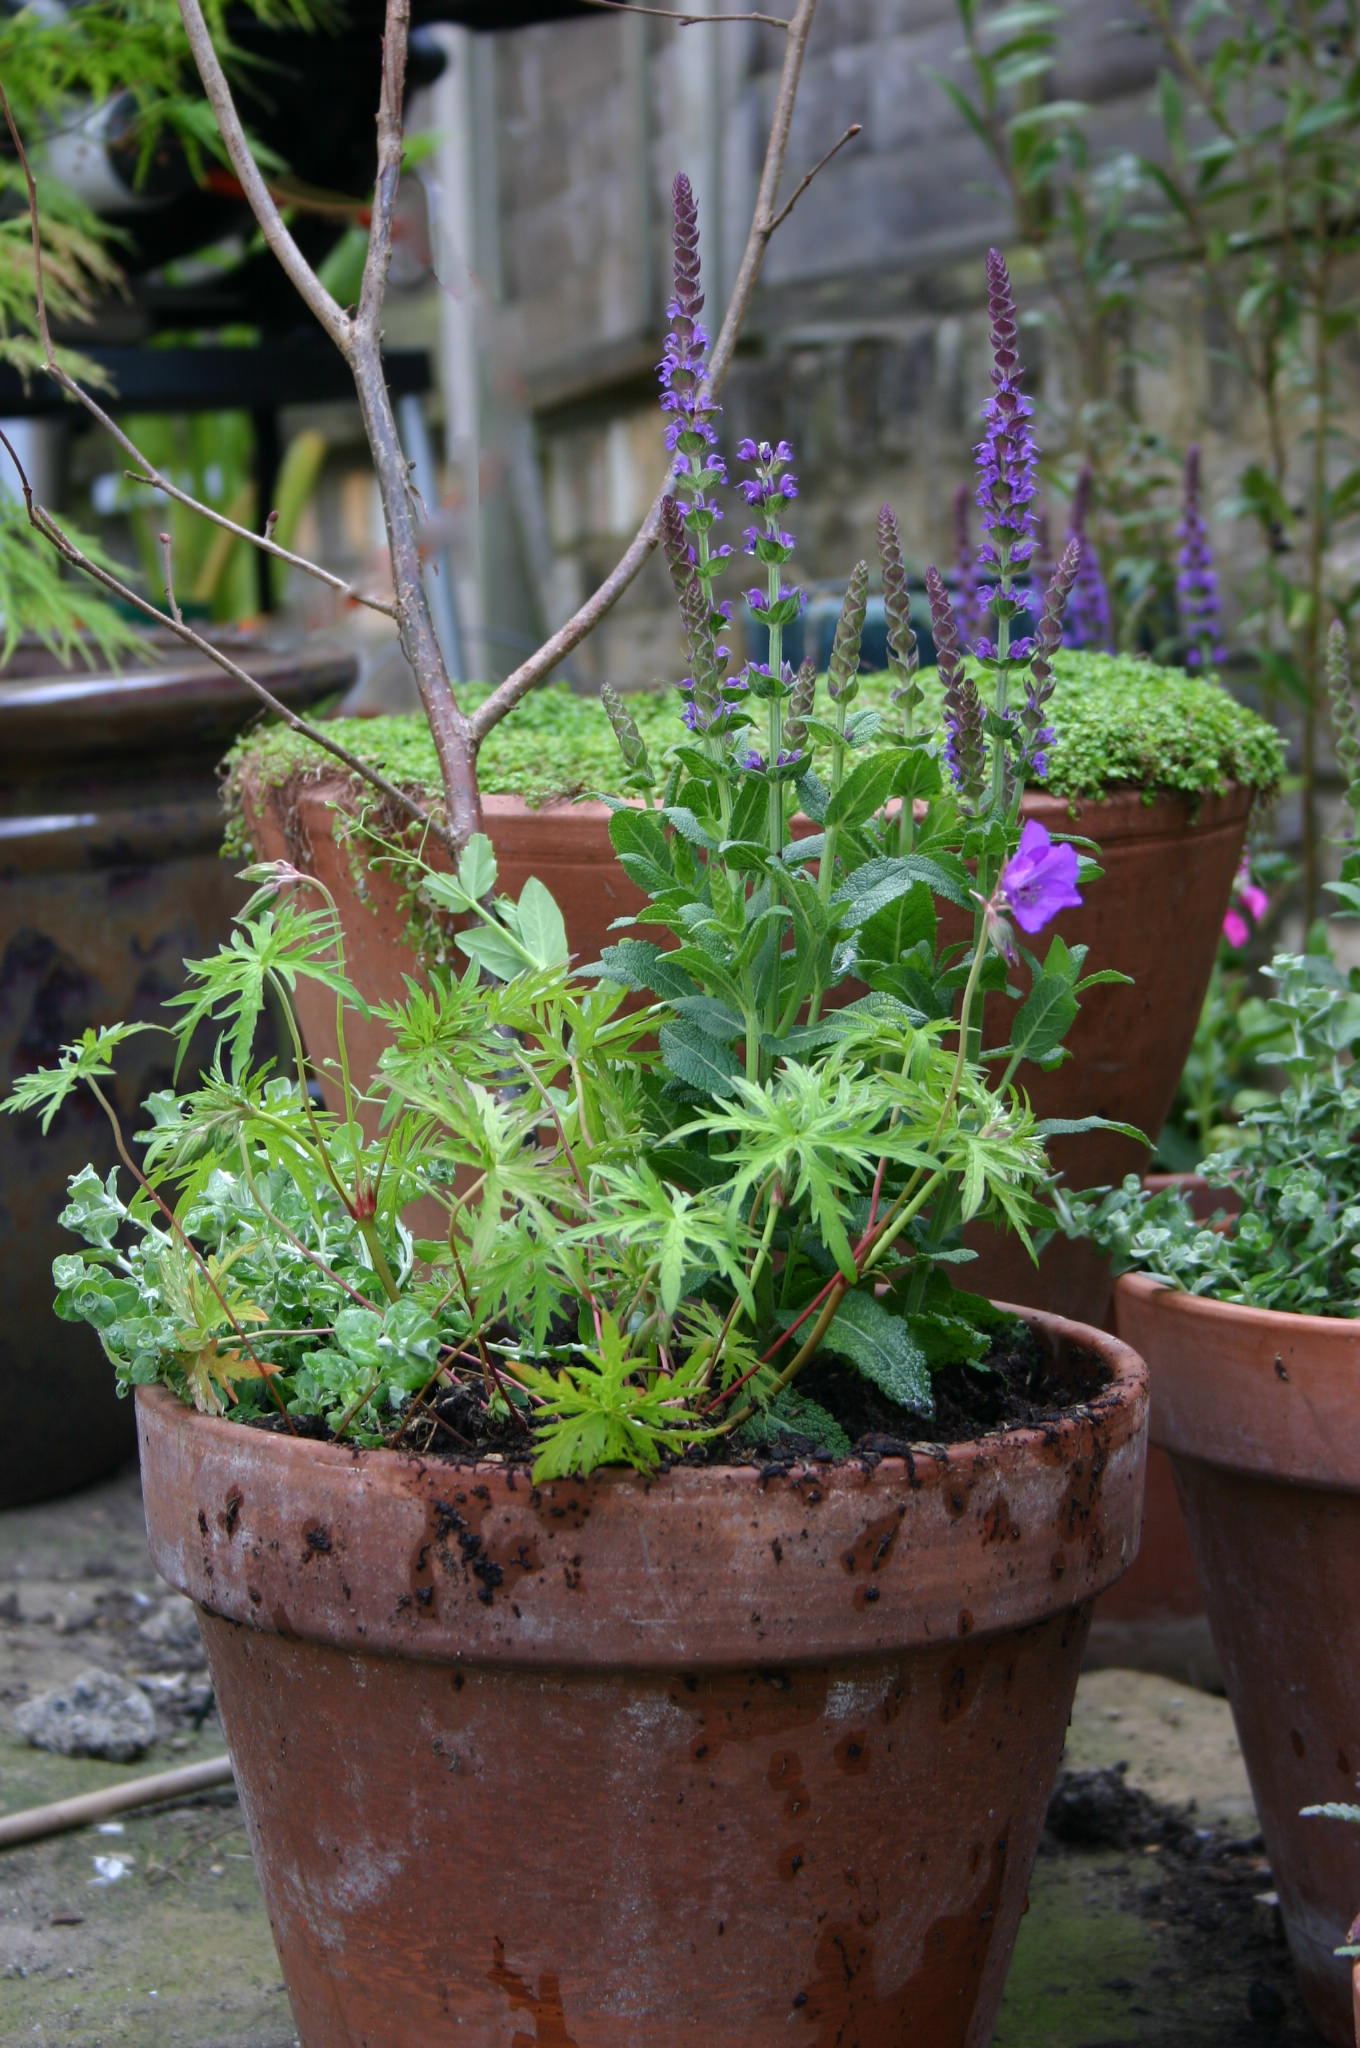
...My May One-Pot-Wonder is inspired by some utterly beautiful little Salvias I saw yesterday at my local garden centre.  I bought three of these little lovelies (always buy three of everything, unless it's Jimmy Choos, in which case you want three different pairs)...anyway, where was I?...Ah yes, the salvias - so prettily spikey and violetey blue.  I also came across one lonely Geranium - the last one left, and I just had to rescue it.  When I got home I put all this in a pot with some hairy-soft silvery helichrysum (the mini-version)...perfect....but then I remembered the utterly gorgeous Alys Fowler who I'm watching avidly on telly doing her thing and as an homage I stuck in a pea seedling with a willow stick:

I know, the photo is pants - I just can't seem to get the essence of it - here are some close-ups:

So: here's what's in my pot:

1 Salvia nemerosa 'Ostfriesland'

1 Helichrysum microphyllum 'Silver Mist'

1 Geranium Kashmir Purple

1 Pea seedling

Some sort of support (I used willow peasticks)

The pot is 30 cm diameter and I used ordinary peat-free multi-purpose compost with some fertilizer granules thrown in.

An April Offering: One-Pot-Wonder

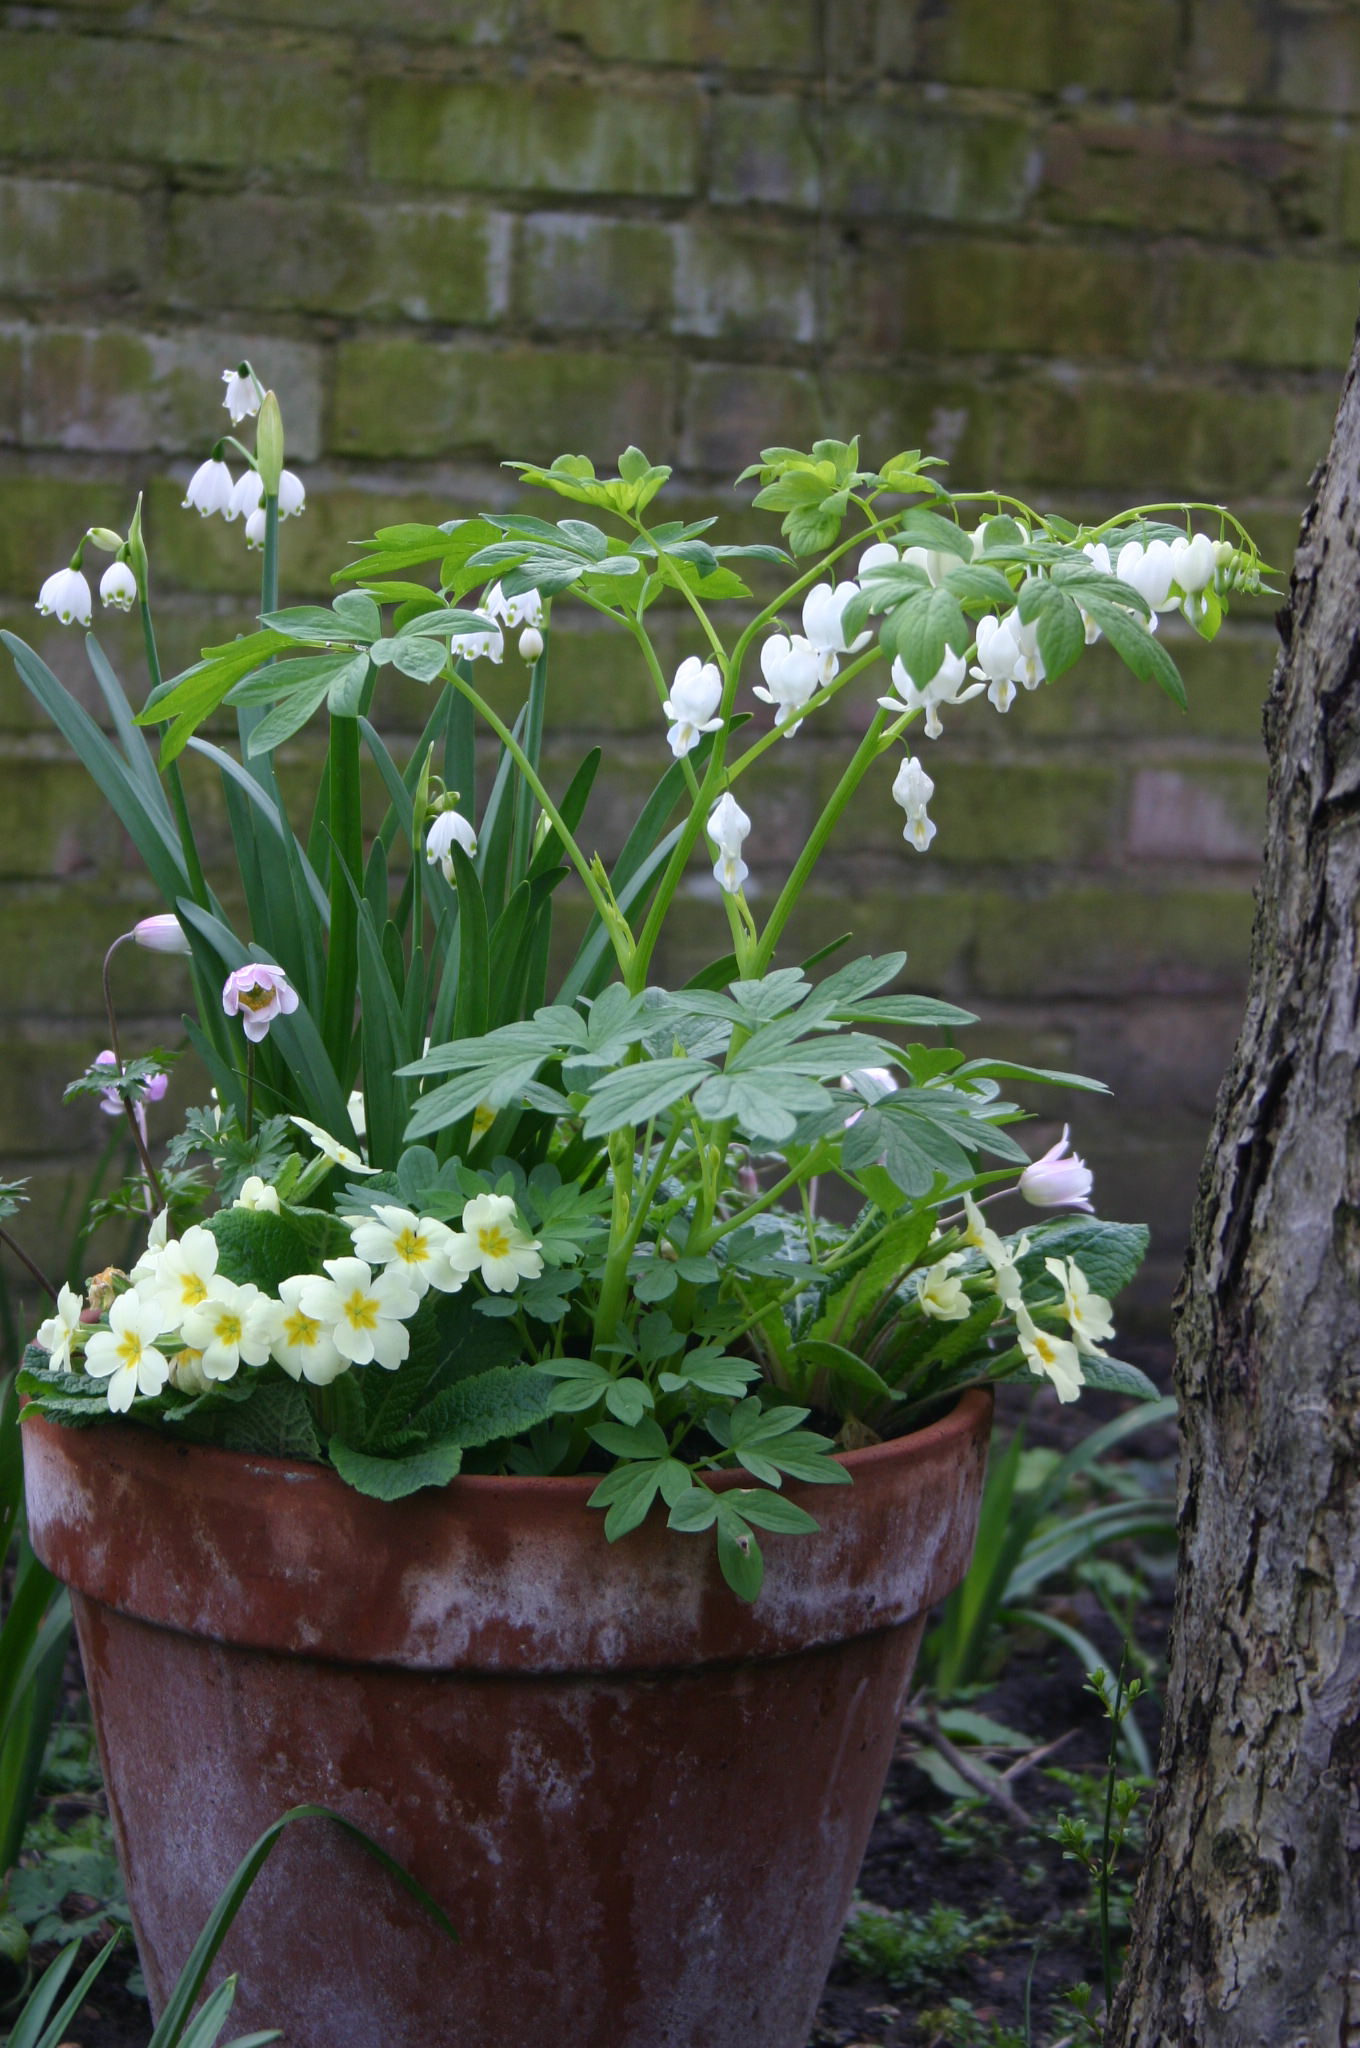
Opw April Some calming, pared-down chic before the party that is summertime beginneth… I love it. Here’s what’s in it:

  • 1 Dicentra spectabilis ‘alba’ (Dutchman’s breetches or Lady in the Bath)
  • 1 Leucojum aestivum (Summer snowflake)
  • 3 Primula vulgaris (Wild primrose)
  • 2 Anemone blanda (Grecian windflower)
  • I used peat-free multi-purpose compost and the pot is 30cm diameter.