What's on my terrace: Five plants for low-maintenance, textural bliss


Having a gardening blog, I am constantly pulled toward the fresh and new…having something novel, and preferably photogenic to ‘show everybody’. But I’m reticent too, because constantly renewing containers ‘for the season’ couldn’t be further away from what I’m actually about, so although I will always use bulbs in pots, and will sometimes be seduced by bedding on sale at the garden centre, the backbone of my terrace is necessarily unchanging. It’s populated by large pots filled with permanent, evergreen(ish) plants that I never have to do anything to except water. And I want to share what those plants are, because although none of them have any flowers on them right now, my terrace would be completely bare without them. They are the backbone.

  1. Agapanthus - essential strappy beauty that is both smart and evergreen. Of course I love the flowers but they are a fleeting thing - the real joy comes from the leaves. You can find out all about agapanthus in this post, but know that they like to have their roots constricted in order to flower. Oh, and I should probably add that I have watered these troughs roughly three times in the last 11 years. Yes, you read that right.

  2. . - Evergreen ferns are my number one pot-inhabitant for a terrace. Although I understand and have a soft-spot for box shapes in pots, the maintenance (not to mention having to protect them from the dreaded caterpillar) is too much for where I am in my life right now. Evergreen erns are zero-maineneance (unless you find removing a few brown fronds once a year taxing) and just SO ROMANTIC. Here are my favourites.

  3. Standard lilac - These might be an odd choice but my miniature standard lilacs which I ordered after spying them in an advert at the back of a sunday supplement fifteen years ago, continue to serve me well. They are not evergreen, but their frame supports fairy lights in the winter, so they become garden lighting, and of course the scented blooms when they come are out of this world. I’ve re-potted them three times in their life.

  4. Scented pelargoniums - I have only recently discovered the joys of a scented pelargonium in a gigantic container. In fact they have been so incredibly successful that I am going to have to buy new containers for my sweet peas next year. I live in London (and I am NOT sentimental about plants dying) so I keep mine outdoors all year round. I now have four enormous pots of scented pelargoniums (Attar of Roses, Lady Plymouth and Grey Lady Plymouth) and I’ll be moving them up nearer to the house next year for extra colour on the terrace. They are a joy.

  5. Papayrus - this is a bit left-field, because you may not have a pool or pond, but I do, and I have a LOT of this plant, which brings me an awful lot of joy. You can actually grow it in a large pot (plenty of water please) and it is just so bloody majestic.

  6. Herbs - Thyme and parsley (and basil in the summer) in large pots - never not useful.

x Laetitia


Book review: The Garden of Vegan by Cleve West

garden of vegan cover.jpg

First up, I think I should probably tell you that this won’t be about Cleve’s beautiful gardens - to find out lots about them, listen to the podcast we did together.

Secondly, learning about a very different way of life is a process, and we’re all at different stages of that process. The essential component when learning about something new is to listen with an open heart, and think hard before you jump in with counter-arguments, about where those strong feelings come from. If you find saying defensive stuff, or resorting to humour, recognise that and ask yourself why.

So with that said, and before I talk about this book, here is where I am with veganism.

The answer is that if I were alone with no dependents, I would most probably be pretty far down the vegan path. I’m a grazer and I don’t like thinking about what to eat or cook. My favourite food is marmite on toast and (GASP!) I’m totally fine with margarine.

It wasn’t always like this though. This attitude is, ironically, the PRODUCT of being a mother, having to cook varied and exciting meals (constantly in lockdown) for three children and a Rotter, each of whom have…well, let’s call them FOODIE PROCLIVITIES shall we?

I used to love preparing and thinking about food. I used to spend hours baking and decorating and creating the perfect this, that or whatever. I learned to cook properly at Ballymaloe, so I have a good, if basic understanding of food. But it’s all become a total chore now. I have lost the passion I once had for creating elaborate feasts, because I HAVE to cook, day in, day out. It’s boring, and I’d prefer to be doing other things.

This brings me rather clumsily to the reason why we still have meat and dairy in our fridge; because these are things that are easy to prepare, that I know my children and husband will eat, without a fuss, so I can get on with the rest of my life. It might be a bit pathetic, but it’s the truth.

I understand that there will be lots of people who hate the idea of veganism for whatever reason. I am not one of those people; I’m reasonably convinced that in the case for veganism, the numbers stack up (i.e. that if we all stopped consuming animal products, we’d reduce global warming significantly and that most of us would become healthier in the process. I’m also cognisant that for some (including myself actually) a fully vegan diet doesn’t seem to add up to optimal health - I can easily do without meat and fish, I find it difficult to feel good, long term without the odd egg. Furthermore I’m painfully aware of the plethora of disadvantaged humans for whom cheap meat is the ONLY source of available food, along with the multitude of other humans whose livelihoods depend on the meat and dairy industries; that I come at this from a privileged space. I am aware.

I’ve tried Veganuary multiple times and found it pretty easy. It’s been the milk in my morning tea that has always had me in its grasp; I’ve found that I’ve had to give up tea altogether, which is a bit much in the winter time. It’s my comforting crutch you see, and without it I am pulled to all sorts of other things, as well as always feeling that my day, such as it is, hasn’t really BEGUN until I’ve had a cup of tea. So the milk in my tea has stayed, and then the exhaustion and boredom of having to put something together for myself, whilst my children eat philadelphia on toast is sometimes just too much, and I just eat what they’re eating…you get the picture.

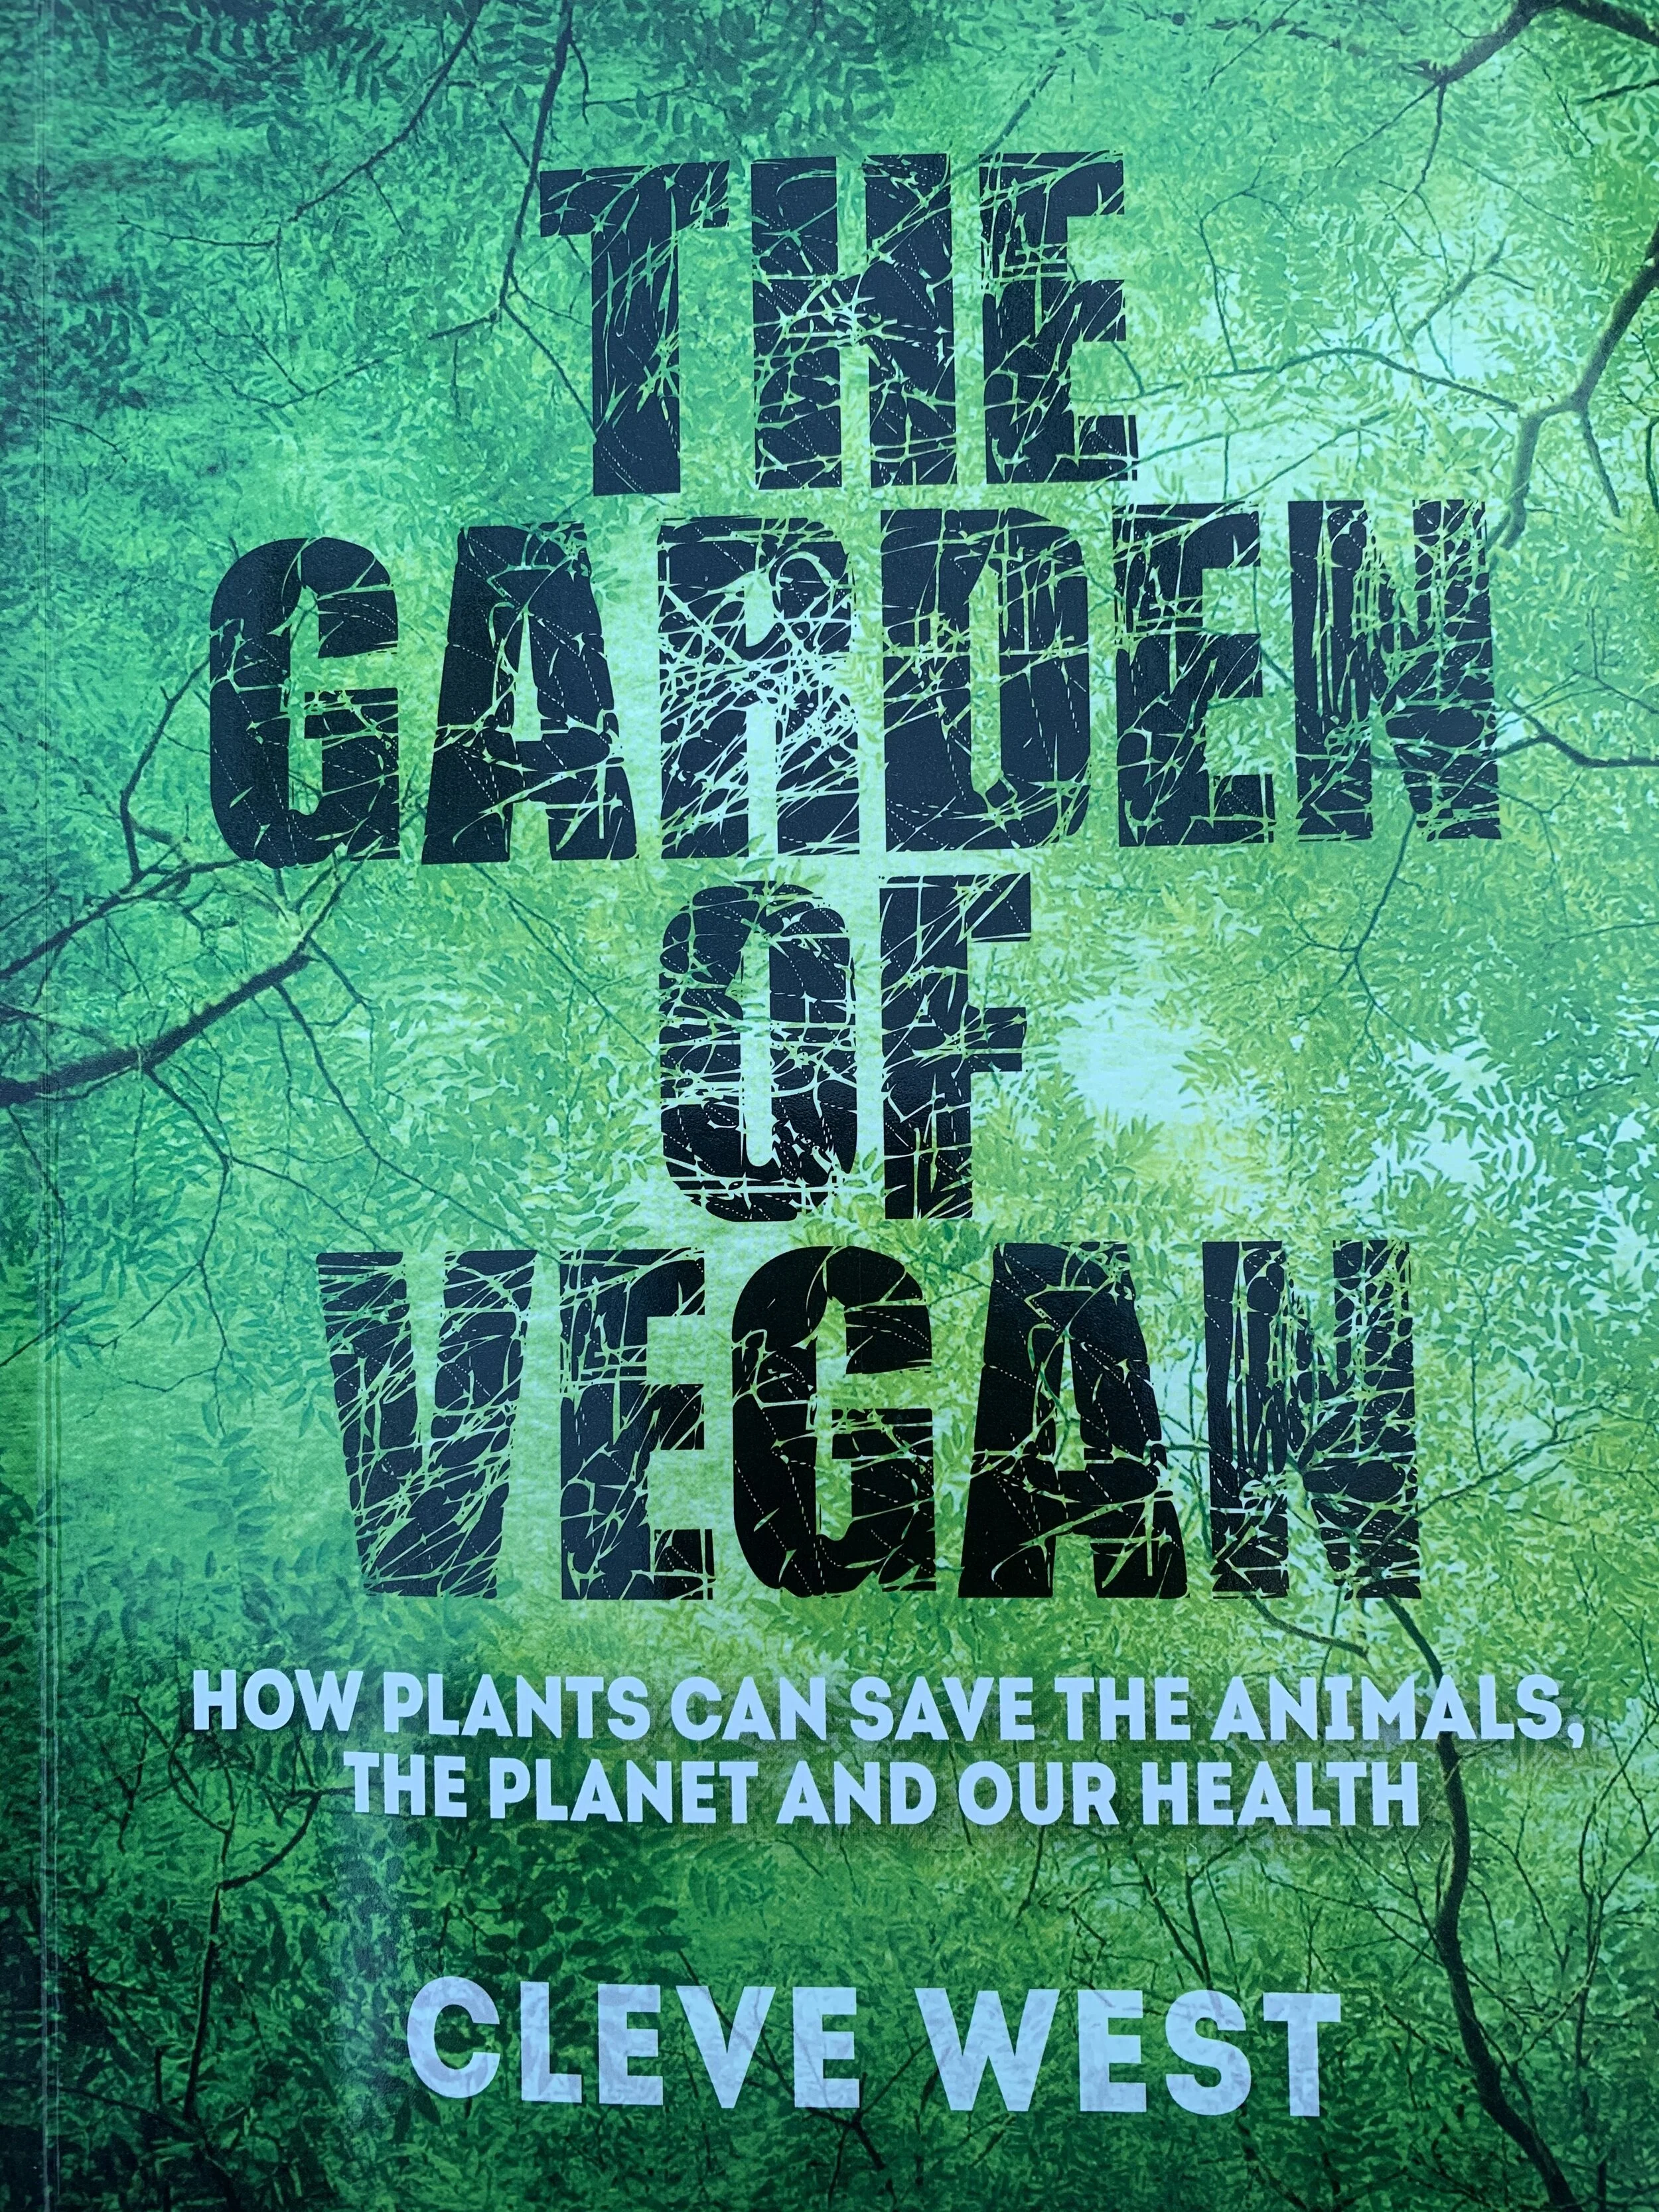
I read Cleve’s book in a weekend. It is incredibly palatable, and thankfully not full of gory details (although there are, naturally, some pretty horrifying bits). It is an exhaustive introduction to anything you might want to know about veganism. Every statistic, from how much methane farting cows produce worldwide, to how much plant protein it takes to create the same amount of animal protein, to how much B12 a person actually needs is fully researched and set down here. More crucially, every argument against veganism is calmly and carefully set out and dealt with.

The interesting thing to me though, is the fact that these things still need addressing. I mean, obviously they do, because most of us are still, as a species, obsessed with the idea that we need to eat animals (certain, very unlucky animals) and their milk in various forms. But reading this book I am flabbergasted as to WHY. The numbers themselves, quite apart from the reality of the brutality that goes into making sure we get a supply of cheap animal product to eat - speak for themselves.

It’s ok, because Cleve addresses this question as well, and as with so many things, the answer lies with our human brains, and the fact that we don’t like change, and are easily persuaded, via tradition, that because we have been doing something (animal agriculture) for many years…because our grandparents and great-grandparents and their ancestors did it, AND HEY! THEY WERE GOOD PEOPLE! - because it’s normal to us, that this makes it OK. This book jolts you out of those calm lapping waters. Just because it’s been going on for centuries, that doesn’t make it right. Just because it is considered ‘normal’….

like slavery - slavery was once considered ‘normal’

and women not having a vote - that was once considered ‘normal’

oh, and sending kids down mines - that was once considered ‘normal’

You see what he’s getting at here…

Are you going to be the guy who ignores all that, laughing at the vegans with their knitted yoghurt, or will you get angry with them, tell them that it’s all very well for them, because they are privileged and ABLE to be vegan…are you going to be the guy who buries his head in the sand? Or will you listen to a viewpoint, weigh up the evidence, and take action based on your conclusions?

I’ve been sitting in the middle for a long time…telling myself that there MUST be a way to source ethically reared, HUMANELY killed meat and fish, oh, and milk that could somehow be SHARED with a calf or two like certain homesteaders I follow on social media (whom I really believe have achieved this magical thing) Gosh it would be so lovely, wouldn’t it, if we could get ethically reared, HUMANELY killed meat, but we would all have to be super-charged, rare-as-hen’s-teeth homesteaders like them to do that, and darlings, we are WAAAAY past that point. There are just too many of us. Dreaming of this utopian world (along with navigating the muddied waters of the ‘privilege’ argument) has done me a great service - it has allowed me to procrastinate, to DO NOTHING.

And what has this all to do with gardening? Well, the answer is absolutely EVERYTHING actually. To be a gardener and say that you care about the environment, to go all warm and fuzzy over the beauty of your plants and the birds tweeting and the fact that bees are using your specially erected bee hotel, and then to go and buy animal products to eat is, says the author, well, A BIT BONKERS REALLY. This cognitive dissonance, which sees us financing the planet’s biggest polluter whilst at the same time saying that we care deeply about our earth and its wildlife is perfectly illustrated with the question “Why would you eat a cow when you’d never eat a dog?” It makes you think doesn’t it…makes you think for a while, and then go back to you chicken dinner. Humans really hate change.

So yes, actually, gardening has everything (and more) to do with veganism, and Cleve has a point when he asserts that it is perhaps we gardeners who should be the first to embrace change, to listen with open ears and hearts (because listening to vegan arguments is confronting and difficult…it makes you feel squirmy and horrid doesn’t it, to hear about the realities behind the food that we eat…it’s awful to think that even the expensive stuff…the ‘grass fed’ and the ‘free range’ isn’t something we’d wish on our worst enemy, and is a label that’s just been slapped on the carton to make us feel good about our choices…it’s a bit nasty to feel like ones choices aren’t really ones own, that in reality, the multi-billion pound meat and dairy industries are doing everything in their power to keep us consuming their products, and that includes the subtlest and cleverest advertising out there (exactly the same way the sugar industry infiltrates the brains of our children). No, it’s not a nice thing to think about, but does that mean that we shouldn’t?

Suffice to say, I’m back on my vegan journey. This will be nowhere near enough for Cleve, who, (like the multitudes of black and brown humans who not only have to deal with racism, but are also tasked with the exhausting business of EDUCATING others about it for little or no reward), would, in his inimitable way, politely and humbly request that I go much, much further.

The Garden of Vegan: How Plants Can Save the Animals, the Planet, and Our Health by Cleve West is published by Pimpernel Press at £13.99

Peter singer quote.jpg

The Chelsea Chop

How and why to chop your perennials for longer or later flowering and healthier, stockier plants

snippers.jpg

Around the time of the Chelsea Flower Show (end of May) lots of gardeners get their shears out and do the unthinkable - it’s called The Chelsea Chop.

It’s so very tempting isn’t it, to let a garden grow un-checked…I mean why on EARTH would one chop glorious, burgeoning plants just as they are about to fulfil their glorious destiny? The answer is of course that yes, it IS a crazy thing to do, especially if one is waiting patiently for a prized plant to flower, BUT there are reasons to be bonkers in the garden, and here they are:

  1. Delayed gratification - Chopping a perennial in bud, or whilst it is flowering will delay that lovely event, so that in effect, you get two bites of the cherry

  2. Shorter, less floppy plants - this is VERY key if, like me, you are terrible at staking (or can’t be bothered). Chopping will aid the production of more side shoots, which will give you a shorter, bushier plant.

  3. Late summer abundance - Spring and summer are so lovely in themselves….everything is green and gorgeous. If you chop, then you can get some of that loveliness later on, when the garden is turning, well, BROWN and new growth is scarce.

The science behind all of this:

Plants, as we know, just want to reproduce. That’s their THING. If you bear to chop some stems before high summer hits, then they will respond to the apocalypse by producing more stems and flower (to make up for the flowers and potential seeds that have been removed.

I’d love to give you a blanket rule. When I first began Chelsea Chopping I searched and searched for lists of plants that I could chop and those I should leave alone. The nearest thing I’ve found to a comprehensive list is the truly brilliant book by Tracy Disabato-Aust The Well-Tended Perennial Garden.This book isn’t just about chopping and deadheading and pruning - there is LOTS more, including invaluable plant lists and photos galore, but it’s pretty exhaustive if you’re looking for an ‘encyclopaedia’ focusing on keeping perennials looking their best. It’s one of those books that I just keep coming back to again and again.

But as with all things in the garden, experience has shown me that I instinctively know what to do with each plant by using my common sense.

So nose around in the undergrowth and establish which plants are producing rosettes of new growth at their bases…(geranium phaeum is an example) you can chop that one quite close to the ground. Remove the flowers of other things individually (alchemilla mollis is an example of this). Other things can be given an haircut - cutting back by a quarter, third or half (look at thyme, nepeta, santolina and friends here). And late summer blooming plants (rudbeckia and the rest) can again be chopped back to stop them flopping over later. This is a tiny list, but I hope it gives you at least some idea of the possibilities.

Always always treat any plants that you butcher like this to some tender loving care in the form of deep and regular watering, along with feeding too if that’s something you do, to help them recover and give you what you want.

x Laetitia

How to control aphids

..without them controlling you

aphids.jpg

Aphids are annoying, but a crucial part of your garden’s ecosystem. If you can’t be faffed with reading the rest of this post, then the most important thing to know is that it’s not personal.

There are numerous chemical controls out there, and I have tried most of them, but none were a patch on squishing them with my fingers. Yes, it’s pretty messy, and a bit of a job when you’re dealing with an infestation, but team it up with a good spray from a hosepipe and you’ve basically hit them pretty hard. Some people then paint a ring of sticky honey around the bottom of each stem to make sure that any still-alive bugs won’t be able to climb back up again, but frankly I’m not one of those – we must maintain our sanity and leave something for the ladybirds, must we not?

Speaking of which, ladybirds are available to buy in large numbers specifically for this purpose, removing the problem of them not being around in sufficient numbers to deal with infestations quick enough.

For the more organised, companion planting is a must, and it really works. Aphids are repelled by onions, garlic, marigold (tagetes) and many of the smellier herbs. In the same vein, a few sacrificial nasturtiums planted nearby may well lure them away from colonising something more precious.

For highly prized, more delicate plants, a thorough spraying of water mixed with a couple of tablespoons of washing up liquid will get rid of them.


x Laetitia

Deadheading how-to

The garden may have yet to explode into flower, but we all know that when it does (and that moment is only around the corner) maintaining some semblance of calm can feel a bit overwhelming, especially when the main priority is to kick back and enjoy the garden. I have the solution and it involves - in most cases - your thumb and forefinger.

aster frikartii monch.jpg

Deadheading is your get-out-of-jail-free card - achievable in five minute bursts, whilst chatting to friends, and with a glass of something delicious in the other hand. You will be amazed at how the garden will rejuvenate if you keep doing this, little and often.

The idea is a simple one - plants make flowers in order to attract insects who pick up pollen, and unwittingly transfer it from one plant to another. Once this happens, the flower then sets seed, which is a bit like cooking a baby (beyond exhausting). If we remove blooms as soon as we see them go over, we can stop this process, and make the plant produce more flowers in an attempt to make more seed.

Practically speaking, removing the flowers should be done in what ever way is the easiest. For roses, just grab hold of the flower, grasping the swollen bit beneath the flower, and snap it off cleanly. For bedding plants like pansies or petunias it’s the same thing, but more of a pinch than a snap. For perennials you may need a pair of scissors but exactly the same rules apply - deadhead as soon as a flower isn’t at its peak.

In terms of what you should and shouldn’t deadhead, use your own aesthetic leanings, leaving anything that looks good in death, or plants whose berries or seeds you love, well alone, as well as sparing a thought for the birds, who rely on seed-heads for vital nutrients.

x Laetitia


Three things to do with your kids during lock-down once you have sown all the seeds

Let’s talk a bit about the ‘lull’ after the initial enthusiasm storm shall we?

small child pricking out rudbeckia

small child pricking out rudbeckia

Hands up if you’ve sown ALL the seeds with your children? I think if I suggest one more bout of seed sowing to my children they might apply to divorce me. I don’t know about you, but I’ve had to dig deep and take myself back to when I was a child, thinking about what motivated me, and what I wanted most. The answer of course, is that what I wanted most in the world was to be a GROWN UP!

I wanted to do what I wanted, and wear what I wanted, and eat what I wanted and sleep when I wanted. I wanted to watch what I wanted and buy what I wanted, but more than any of that, I wanted to have what I saw as the ULTIMATE goal of being a grown-up: I wanted to be in charge of, and DO all the dull, mundane tasks that constituted adulthood. Like shopping, and hoovering, and paying bills and going to work; all these things seemed deeply inviting to my childhood eyes. I resented being made to play with toys, or draw a picture (something my mother would have given her right arm to do) and continually requested to be taught how to use the iron until she relented and I spent hour after happy hour ironing things until there was nothing crumpled left in our lives (and no, I haven’t retained my love of ironing, but I CAN iron a shirt in under a minute).

Ok, perhaps I was just an odd kid, but the principle of teaching children life skills is often forgotten as we drown in adverts for ‘ways to keep the kids entertained’ and the like. I had totally fallen victim to this way of thinking until lockdown started and the stark reality of life without my cleaning lady kicked in. I pulled out the cleaning stuff and suddenly realised that my bored kids would be absolutely capable of doing this themselves. Even my cleaning products are safe for them to use.

So we began with the bathrooms. Everyone loved cleaning and started fighting over the cloths and bottles and loo brushes, so I resolved to take the whole shebang outside.

Disclaimer: I am in NO WAY advocating leaving your children alone with any kind of garden machinery or equipment. Quite the opposite in fact: These activities require a lot more parental control and care than I am normally used to. But once they are learned, they are learned. Some of these things will need your supervision for years to come, and some can be handed over more quickly. As with everything, your parental instinct will guide you.

  1. Mowing the lawn

There is zero reason why they can’t learn to use a mower. I would instinctively shy away from a petrol-powered mower, but if it’s electric or battery powered, it’s absolutely fine. Teach them how to get the thing going and then walk behind them.

small child mowing the lawn

small child mowing the lawn

Don’t be attached to perfect stripes or anything else for that matter; you are teaching a child how to use a fairly sizeable piece of machinery and that should be the only object. The real joy in this is the preparation and aftermath. So get them out onto the lawn beforehand, with a competition to remove as many non-grass things as possible - sticks, stones etc and bring them to you. Afterwards, give each child a pair of scissors and have them edge the lawn.

2. Pricking out

If you follow me on instagram you may have seen me do this with my five year old. Believe me, this is NOT something I would ever have contemplated including my children in before lock-down. It’s one of those delicious mindless activities that I actively look forward to. Sadly those times are a thing of the past now, and I figured that unless I got my children involved with the pricking out and potting on of the approximately ELEVENTY BILLION seeds we have sown together, they are all going to perish.

small person potting on

small person potting on

I could not have been more surprised and delighted with her competence. I showed her how to hold the seedlings by the leaf rather than the stem, and how to make a hole in the compost with her finger, and she was totally instinctive about pinching the compost in around the roots to settle each seedling into its new home. Do this. You will cry.

3. Pruning

Again, not something I would ever have wanted to include my children in before this strange state of affairs hit us, but I’ve been thrilled and joyful about my children’s enthusiasm when it comes to wielding the secs. The trick, I have found, is to teach them the rules of pruning whichever particular shrub I want cut, and then get them to tell ME where to cut. THEY look out for fat buds and decide which ones to chop above. I then hold the stem and they cut slowly and carefully where we’ve agreed. Gloves are essential with roses of course, and I would extend this, if they get bored by asking them to take some scissors and cut a posy for the house, again, telling them the ‘rules’ (show them how long you want your stems, and how to plunge everything straight in water etc).

So that’s three things, but there are SO many others…here are a few more:

Tying in: let them tell you when something needs tying in and older children can do it for you once you’ve shown them how. Younger children can tell you where to tie.

Feeding plants: Get them to fill watering cans and add liquid seaweed at the require amount, and then douse your plants with it.

Hedge trimming: older children, (under strict supervision) would adore this job.

jet-washing: if you have a jet-washer this is a really great job for a child to perfect, again, under supervision

x Laetitia


How to clip box without agonising over it

Snippety snip!

Box ball, very inexpertly clipped by me, but also, perfectly fine by me!

Box ball, very inexpertly clipped by me, but also, perfectly fine by me!

Clipped forms in the garden are a wonderful - if paradoxical - way to give it that ‘natural’ feel. There is a very great difference between something that is neatly clipped and one that is left to get shaggy - not that any one look is the ‘correct’ one, but oddly enough, if you’re seeking a laid back feel to your garden, a few tightly clipped forms (and a mowed lawn) will get you there faster, and with less work than weeding and tidying for ever and a day.

The lowdown, from topiary sculptor Jake Hobson, whose Sentei Topiary Clippers (£49 www.Niwaki.com) are a delight, both in the hand and to the ear, is as follows:

  1. Don't constrain yourself to box or yew; if you have a small-leaved evergreen in your garden that you think will look better shaped, then go for it.

  2. Don’t be too rigid in your expectations either; allow the plant to dictate the finished form. A beautifully clipped wobbly blob will always look better than something that’s being forced unwillingly to be a perfect geometric shape.

  3. In terms of post-clipping care, if the plant is happy and in the ground then you don’t need to fertilise afterwards (container plants are a different matter). Jake uses Maxicrop seaweed extract for anything in need of a boost.

  4. And when to clip? Be intuitive, says Hobson -  “The best time to clip, obviously avoiding extremes of heat or cold, is quite simply when you think of it”.

To this I would only add that though it might seem awful to clip away at lovely new growth at the beginning of the season, you will be stimulating more new growth lower down the stems of the box, which means that your shape will be denser and more delicious if you are a bit brave.

I am aware though, that many (including myself) enjoy a ‘rule’ or twelve when it comes to gardening, so if that’s you, then I’d say the following:

Clip your box in May or June, and then again in August or September. Feed in Spring.

SIMPLES

Lastly (but very important) read this post on box caterpillar and arm yourself with some Topbuxus Xentari to keep on top of the blighters without harming other beneficial insects. I also use Topbuxus Health Mix for feeding, along with the seaweed extract Jake recommends above.

x Laetitia

Book reveiw: Diary of a Modern Country Gardener by Tamsin Westhorpe

I’m a city girl, dear reader, and as such I naturally dream of moving to the countryside, where the air is fresh and the view is unending, and the garden is, well, a bit bigger maybe?

TW cover.jpg

Gardening for me thus far has always happened within an urban space, so it was a particular delight to receive Tamsin Westhorpe’s first book “Diary of a Modern Country Gardener”, not only because, well Tamsin has such a massive wealth of horticultural knowledge, but also because this book is a veritable treasure trove of bite-sized nuggets of information, conveyed in a relaxed, un-stuffy and thoroughly modern manner.

For example, I now know when winter barley is cut (end of July…you’re welcome), and that too much rich grass will give a horse something horrible called laminitis. I know that if I want a rabbit-free garden I must first install a fence that goes underground as well as above it, and that a bottle-fed lamb (or ‘tiddler’) is always recognisable because it’s always friendly and impossible to herd.

Oh, and look at this brilliant page about keeping hens which has saved me SO much future heartache and hassle… I will leave hen-keeping to those who are okay with MITES.

TW review hens.png

I love these little snippets of information - they are fascinating to me and underline the huge differences between urban and country gardening.

The horticultural element of this book is equally rich. Tamsin manages to tread that fine line between providing a LOT of information and plant suggestions all within her approachable, chatty prose. Full disclosure; I know Tamsin a bit - she interviewed me for her podcast ‘Fresh from the Pod’ and have met her many times at events, and let me tell you, her writing really is exactly how she talks. I love this about the book because it’s like sitting with an actual person.

It’s laid out in diary format, with a few entries for each month, chronicling snippets of Tamsin’s extremely busy life as head gardener at her family garden at Stockton Bury (which is open to the public) and also as a regular speaker and RHS judge. It’s split up into three sections: Late Winter And Spring, Summer and Early Autumn and Autumn and Winter. This is genius (as a garden writer I always struggle with the ‘in-between bits’ - when does late summer become early autumn? When does winter actually end? etc.) So the book actually begins in February, which, let’s face it, is the month most of us start thinking about poking our noses outside.

TW review contents page.png

Each month has a Tool Kit list (eg ‘A tin of biscuits in the tool shed for those low-sugar moments’)

A must-have plant list

A things to do list

A country project - eg how to grow onions and make an onion plait, or saving seed (below)

TW reveiw project saving seed.png

And then at the end of each section is a list of seasonal treats.

This is essential reading for anyone gardening outside of the city, but it is also a really useful (and dreamy) one for urban gardeners too. Perfect bedside or bath time reading.

Highly recommended!

Diary of a Modern Country Gardener by Tamsin Westhorpe is published by Orphans Publishing

x Laetitia

Mulch demystified - How to mulch, when to mulch, and what to mulch with.

Because it’s THAT TIME OF YEAR, and I get a fair few questions about mulch, I thought I’d put what I do here. This piece originally appeared in my weekly newsletter.

mulched flower bed

Mulching can be a bit of a minefield, so here is my attempt at demystifying it.

What is mulch?

The word ‘mulch’ is used in gardening to describe ANYTHING that you put on top of your soil. So that could mean horse manure, or it could mean thick black plastic sheeting. These two things are obviously totally different, so it’s useful to split mulch into two groups: Organic and inorganic.

Organic mulch is a mulch that originally came from something that was alive; manure, grass clippings, shredded bark, compost, shredded newspaper…all these things will decompose over time and be incorporated into your soil by worms.

Inorganic mulch is a mulch that comes from something man-made or which doesn’t break down; plastic sheeting, shredded rubber tyres, stones, landscape fabric. These mulches are used to suppress weeds and/or to give a ‘decorative’ finish to a border but apart from preventing moisture loss, they don’t contribute to the soil structure.

Adding organic material on top of your soil and around your shrubs and trees is generally agreed to be of benefit to them, particularly as it helps to prevent evaporation. Depending on what you use, it can also add nutrients to poor soil, which is generally considered ‘a good thing’ (although NB you may not wish to have ‘rich’ soil if you’re trying to grow plants that thrive on poor ones!) Piling on extra organic material will also build up your flowerbeds, which can tend to ‘sink’ over time. It will also make it harder for weeds to come up and find the light, weakening them, and lastly, but importantly, a dark mulch will just make everything look totally glorious…!

What to use:

The best mulch is your own home-made compost, but most of us don’t have enough of that (if any). If you are buying compost from somewhere please be super-vigilant about its source; the last thing you want is to be applying a mulch made from plant material that contains anything ghastly like weedkiller. Similarly, if you are buying manure, you need to ensure that the animals haven’t been fed on anything that has been treated with herbicide, as this can travel through the bodies of some livestock. I use a mixture of bagged horse manure, which I use around the base of my shrubs, and topsoil (peat-free) which is easy to spread and the easiest option for me with a small area to mulch. My own compost is always spread under my shrubs and trees as and when it becomes available, and I also use my lawn-mowings at the back of my borders.

Mulching rules:

Mulch freely, as and when you want.

Know that it’s easier to mulch in autumn and winter, when there are fewer things in the flower-bed, than it is in spring and summer, when you’ll have to try and avoid tulips and the like.

Know also that the only ‘bad’ time to mulch is when it is very very hot, or very very cold. The reason for this is that a mulch will tend to lock in dryness or cold and amplify it, rather than helping to mitigate. So if you’re wanting to mulch in the heat, then do water first.

I do hope that was helpful!

x Laetitia

Basil from seed...

no need to step outside…

Basil in winter, on your kitchen table. Image by Jill Mead from Sweet Peas for Summer

Basil in winter, on your kitchen table. Image by Jill Mead from Sweet Peas for Summer

Having had trouble with growing basil from seed in the past, the discovery that I could divide a bought pot of supermarket basil quite easily and get all the floppy green leaves I wanted, stopped me from trying for a while, until, in the midst of moving house in the winter of 2010, I came across a forgotten packet of seed and decided to give it another go. This time it worked beautifully and I’ve been growing basil in my kitchen ever since. It’s a lovely thing to have in the middle of the table ready for sprinkling over food for the ultimate taste of summer.

You will need:

A packet of basil seed

A terracotta pot with its own saucer

Some seed compost - This can either e ready-made or you can mix peat-free mulit-purpose compost with a handful of horticultural grit.

A compost sieve (not essential but good)

A squirty bottle to emit a fine mist on your seeds to keep them moist

Method

Fill your pot with seed compost and tap it down gently. Water the compost thoroughly by leaving the whole pot to soak in a tray of water until you can see that the surface is wet.

Now scatter your seeds thinly on the surface of the damp compost. By ‘thinly’ I mean that you want to aim for a spacing of about once seed every half centimetre. Obviously this is impossible to do - I just put it here to give you an idea of what ‘thinly’ means!

Cover the seeds with about half a centimetre of sieved compost (if you don’t have a sieve just crumble the compost between your fingers and make sure there are no big lumps. Firm it all down gently and dampen the top layer with your squirty bottle.

Put the whole thing inside your kitchen windowsill, or somewhere warm and as bright as possible.

Be patient and remember to keep spraying the surface of the compost with water.

When the little seedlings appear, let the m grow on , thinning them out by pinching out the weaker looking seedlings if you see tow or more plants squashed together in the same bit of earth. You may want to take this opportunity to sow another pot of basil in order to keep the good stuff coming, with no gaps in your basil abundance.

Once each plant has six or eight leaves, start harvesting by pinching the stalk just above a new pair of leaves. This will prompt the plant to produce more stems from axils of those leaves you’ve left behind, giving your pot more longevity.

x Laetitia

This recipe was first published in my book Sweet Peas for Summer

Quick topiary for valentine's day

This is a recipe I wrote for my second book ‘Sweetpeas for Summer’. Back then, sustainably sourced flowers for Valentine’s day were hard to come by; sterile, unscented roses shipped in from Colombia or some such place were the norm. How things have changed and it’s now joyfully easy to get a bouquet of British flowers for your loved one, should you so wish. Thing is though, I value permanence above all things, which is why I’m quite into this idea for a Valentine’s gift with a difference…it will last for as long as you look after it, and if you get bored of it, you can just plant it out in the garden and let it romp up a trellis, reminding you how much your love has grown.

Quick valentine’s topiary

Quick valentine’s topiary

You will need:

A small pot of small-leaved ivy

A wire coat-hanger (or if you want a larger affair you can just use thick wire

Some pliers

A pot (20cm diameter is the one to go for if you’re using an old coat hanger)

Peat-free multi-purpose compost and fertiliser granules

Method

First, make your frame. To do this, use your pliers to un-bend the hook bit of the coat-hanger and untwist its ‘neck’. Then fashion this piece of wire into a heart-shape with a two ‘stalks’ about 7-10cm long at the bottom.

Fill your pot with compost and plant your ivy plant slightly forward of centre, gently spreading out and untangling the stems as you go, which will make it easier to cover the frame.

plunge your frame into the centre of the pot, take half of the ivy tendrils and start twisting them around the bottom of the frame. if they don’t stick, then tie them in with a bit of string. Then do the same on the other side. As the plant grows, just keep twisting the ivy around the frame until it is completely covered. You can prune out anything you don’t need. Keep the pot watered and every year, remove the top few centimetres of compost, replacing it with new, to keep the plant happy and healthy.

x Laetitia

What to grow on the terrace in February

Having committed to a predominately green terrace this year, I now find myself scheming with a view to adding something a with some colour before the tulips come out to play. It reminded me that the mild weather may have others tempted to get out and fill their containers with colour, so here are some ideas for what to plant right now to add a little fun to February.


1. Primula

primula

I adore these little stars. They look best in wide shallow containers raised up a little to give them some height (they’re diminutive little stars). You can keep them going longer with regular deadheading and of course, you do NOT have to be boringly tasteful (see below).

primula

2. Erysimum

Erysimum

I adore wallflowers; they are incredibly long-lasting and the colours remind me more of May than February. Bowles Mauve is the classic, but there are other, fancier ones too. Flower colour deepens as time passes, creating an ombre effect with deepest pink at the bottom and pale egg yolk up top. This is the antidote to smart uprightness…here we have a rather more chilled out look; bedhead in plant form - I love it.

3. Fritillaria

fritillary

Gorgeous isn’t it? The snakeshead fritillary is a bulb, and you can find them, pre-planted in little pots right now at garden centres. It’s obviously cheaper to get these as bulbs and plant them in the autumn, but a small pot of them on an outside table is a thing of great beauty, and is therefore very much necessary, so if autumn passed you by, then here’s your chance. Windowboxes are another great place for these fritillaries, as again, it it elevates them to eye-height.

4. Muscari

Muscari

Another bulb, and one that the kind folks at the garden centre will have planted into small pots for you to buy. I love these little bulbs and I think generosity is key here. Cram them in tight and enjoy.

5. Hellebores

hellebore

See my post on how to grow hellebores here, and know that this is no flash-in-the-pan affair; once you’ve planted your hellebores you’ll have something permanent to enjoy that will delight you year after year. The leaves are evergreen and you’ll thank yourself every winter and early spring when the flowers appear.

x Laetitia


Hellebores and how to grow them in small spaces

Helleborus x hybridus has been deeply fashionable for many years now, and it’s easy to see why.

Hanging hellebore

Hanging hellebore

They flower for months and their leaves re evergreen and they have downward-facing flowers in wonderfully sumptuous, bruised shades. These amazing colour permutations are the rust of human hybridisation, (hence the ‘x’ in the name). When I was new to gardening, and having to fit all my plants not containers on my balcony, I bought one and planted it in a hanging basket, so that I could get a good view of those nodding blooms from below. Had I read anything about hellebores before I committed this act of hanging basketry (tales of picture shade and richness-loving), I would never have attempted it, but as with many things in gardening, the plants themselves prove time and time again many of them don’t bother reading the rule books. Indeed this hellebore just kept on flowering year after year and I now regularly put hellebores in hanging baskets and suspend them from the branches of my apple tree.

You will need:

1 Helleborus x hybridus plant (max height and spread should be around 45cm)

1 hanging basket - the larger the better

Compost - I use peat-free multi-purpose, and mix it up with a few trowel-fulls of soil from my garden.

Water-retaining granules

Fertiliser granules

An empty pot

Method

First water ou hellebore thoroughly in its pot so that the roots get saturated. Make sure that the lining of your hanging basket has holes in it (some don’t). If not, then cut some by making a few nicks in the plastic with scissors.

Next, mix the compost with your water-retaining granules and fertiliser (see the packet for quantities). Balance your basket on an empty pt and fill it to 10cm shy of the rim before you water the whole thing. This pre-watering will give the water-retaining granules a chance to expand before you plant anything.

Now remove your plant fro its pot, rubbing the roots gently to let them now its okay to spread out, and plant it firmly in the basket, adding more compost if you need to , but leaving a good couple of centimetres between the top of the compost and the rim of the basket for watering purposes.

Water the whole thing again, and then hang it up!

Float blooms in a bowl

Float blooms in a bowl

You can pick the blooms and float them in bowls for the perfect winter table.

x Laetitia

Frost protection: keeping your plants warm in cold weather

Statistically it’s more likely to snow in Easter than it is at Christmas, so here are some ideas for protecting any tender plants in your garden.

Photo by freestocks.org on Unsplash

Photo by freestocks.org on Unsplash

Moving containers in and out of greenhouses, and wrapping everything else in ghostly white fleece for the winter is a time-consuming job, which is why the ordinary gardener might wish to avoid having anything too tender in the border.

Having said this, most of us have one or two things that need attention in order to see them through the winter; obviously anything that advertises itself as frost tender, but also, particularly if you live in cold areas, anything in a container, where the roots are surrounded by cold pot, and then chilly air rather than the warmth of proper ‘underground’, and anything in an exposed area or ‘frost pocket’, where cold air whooshes past, or sits, motionless and unforgiving for long periods.

The preventative measures are well worth the effort. For pots, a layer of old bubble wrap around the sides, secured with duct tape and string will provide extra insulation, and a bit of a pot shuffle, so that all of your containers are grouped together, is a good idea. I am rather Martha Stewarty about it and have a sort of ‘kit bag’ of fleece and bubble wrap with string, ready to go when the forecast warns. Here are details of my cold weather kit.

The other thing is to get the pot bases off the ground with pot feet to avoid waterlogging. I enjoy being pretty over the top with my pot feet - I love them; the cuter the better. Anything frost tender can be wrapped in horticultural fleece (not pretty, but neither are dead plants) until the danger of death has passed. Finally, mulching thickly with a 2-3 inch layer of compost will provide an extra duvet for the roots of all plants, and the chance of a cosy winter.

x Laetitia